Art Making Activity: For the Birds
My inspiration for this week’s art making activity was birds. I was thinking about birds for a couple reasons. The first being that my reaction to many things these days has become “That’s for the birds!” = (my Gramma would be proud). The second is the train of thought following the age-old question, “Wouldn’t it be amazing to fly as free as free as a bird?”
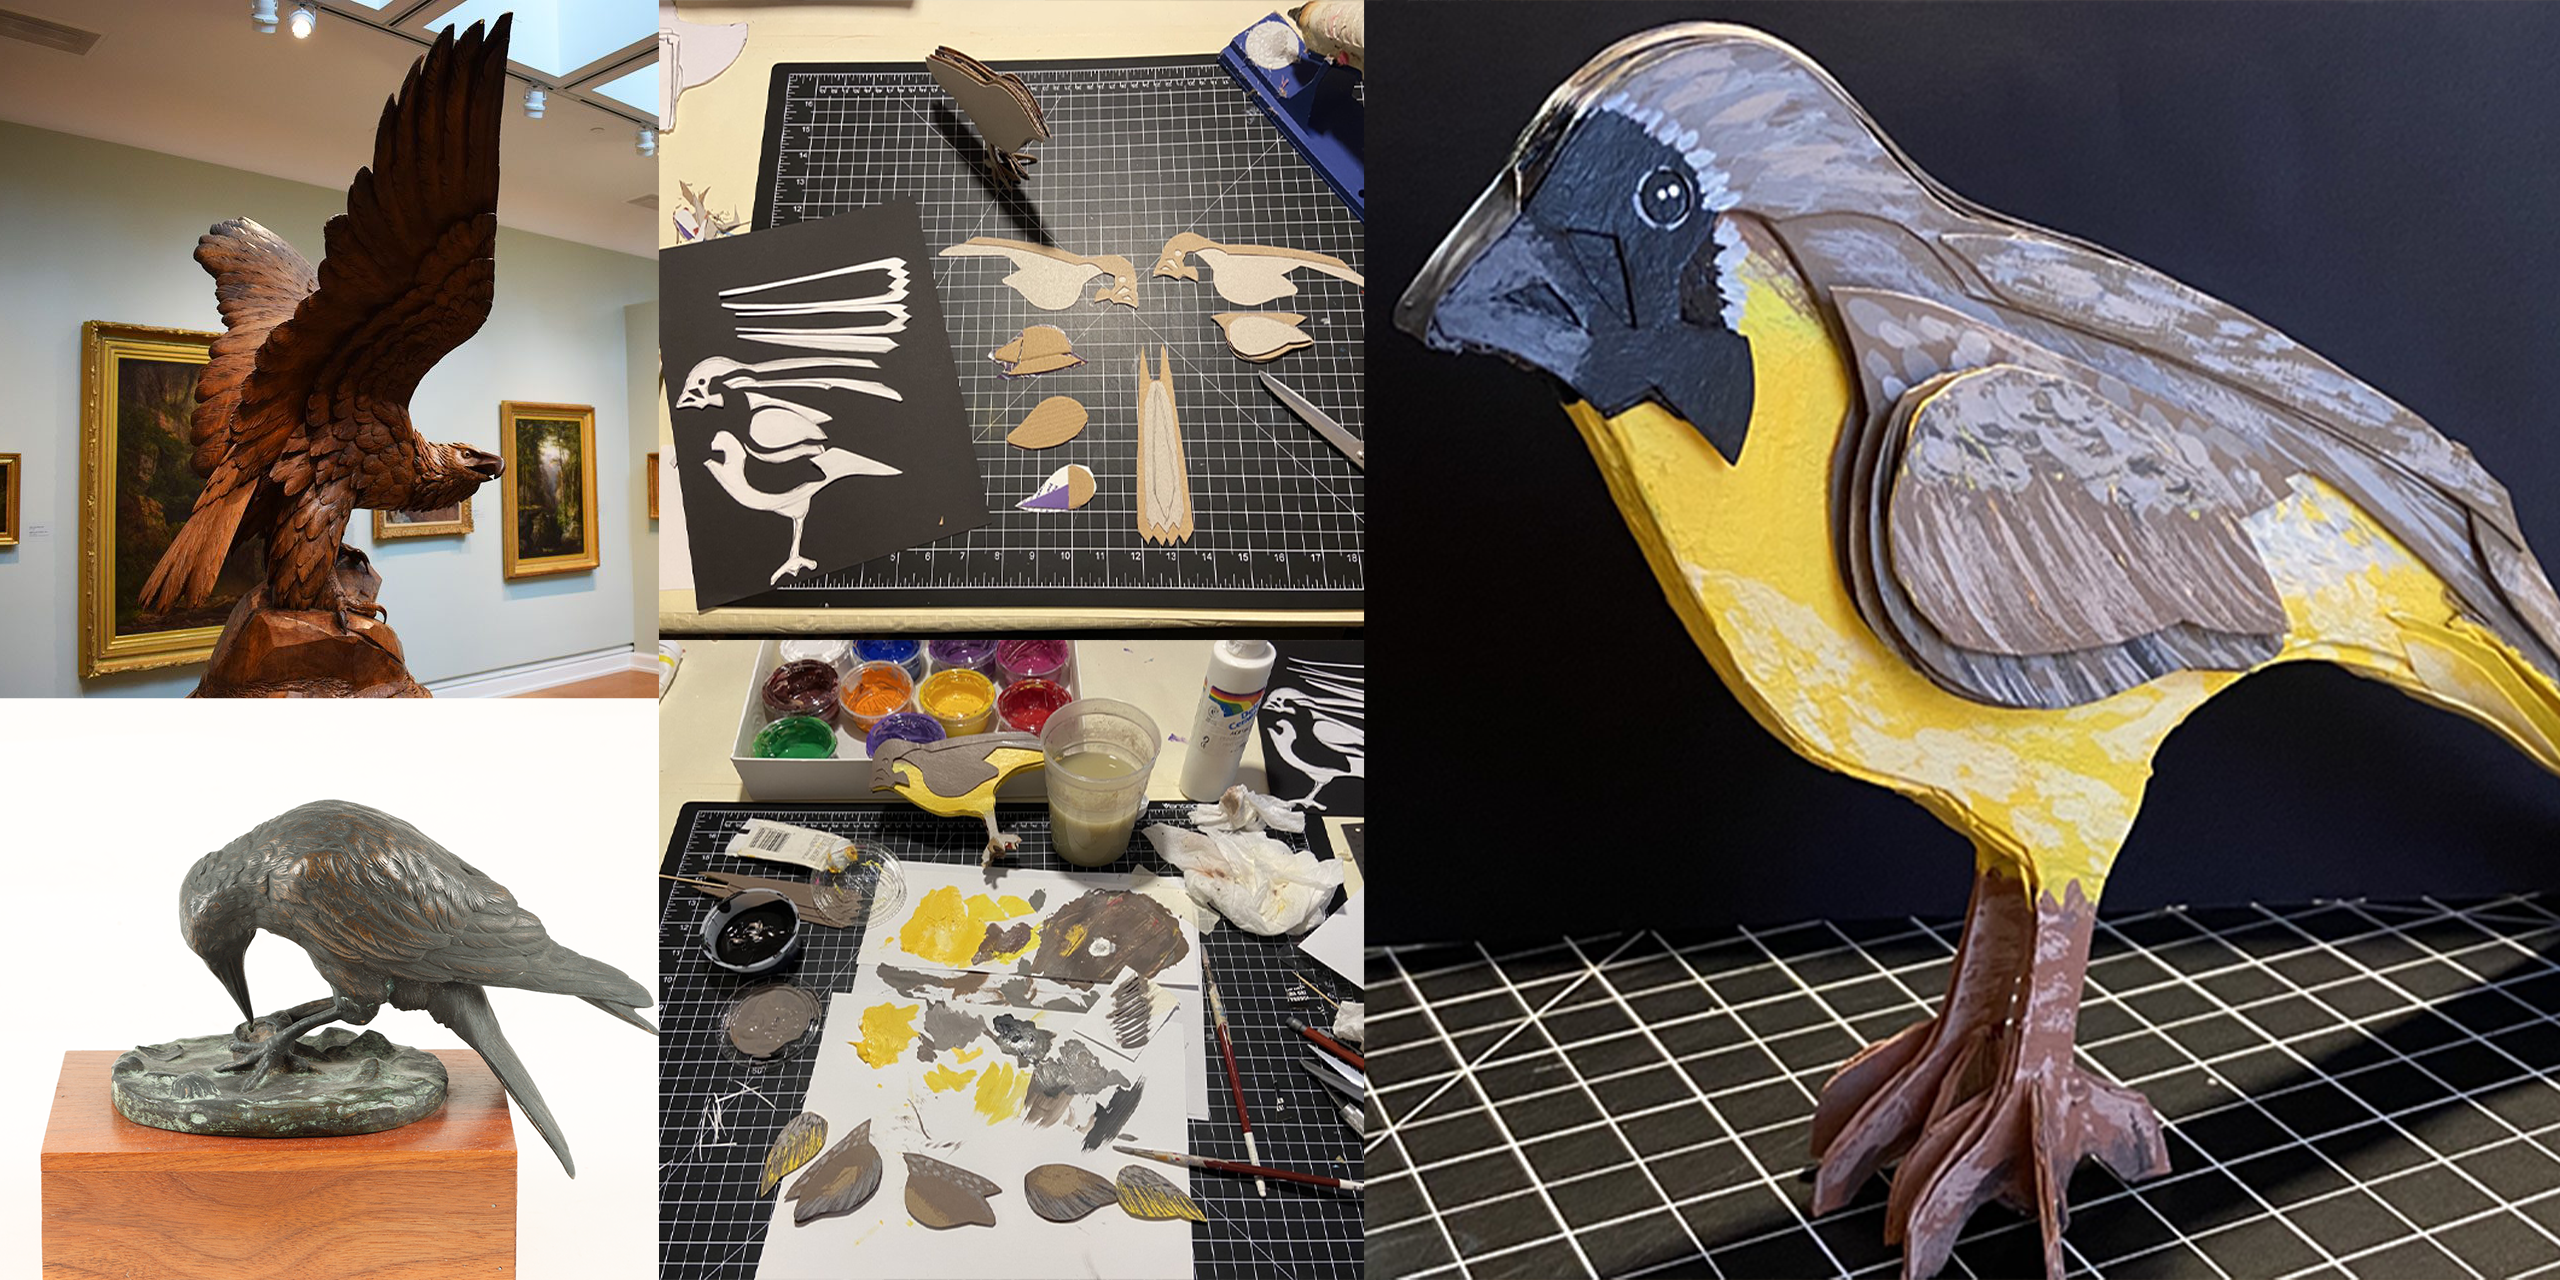
So, since we are all living like caged birds in recent times, I found it fitting to use The Westmoreland’s birds as inspiration. While most folks are not master wood carvers nor have access to a foundry, I looked for materials elsewhere to create a make-at-home relief style bird sculpture.
While creating my Common Yellowthroat bird sculpture, I listened to their songs and calls.
This project is relatively simple and requires only a few supplies:
- Paper
- Hot glue gun and hot glue sticks
- Scissors
- Acrylic paint
Oh, and the recycle bin, of course! I gathered various cardboard boxes from my recycle bin to be recycled into our birds.

Step 1: Drawing the Birds
Create a simple drawing of the subject in profile (the side view).

Here are two examples of bird drawings, but your favorite bird photo can also be a great resource.
Cut out the drawing. This will serve as the template to trace for all of our parts.
Step 2: Tracing the Template
Take the simple profile you just created, and trace it on a piece of cardboard.
A few notes as you plan – the material and complexity of the pattern is up to you, but keep in mind:
- While stacking thicker cardboard can create depth quickly, corrugated cardboard is much harder to cut nice clean shapes.
- Cereal and tissue boxes cut nicely with scissors but are very thin to stack in terms of creating a relief style sculpture.
I chose the cereal boxes for their ease of cutting and used thicker scrap pieces of corrugated cardboard to create depth to each layer as you will see in future steps.

I cut two birds for each side of the sculpture. From here on, as you trace the one side, flip It over and trace its mirrored image. You will be creating two opposite sides of the same relief sculpture that are connected back-to-back.
The photo above shows the one template I made as well as two right and two left side bird bodies.
Step 3: Create Stackable Parts
In this photo, note how the top section of the bird is cut out of the drawing. This was used to trace and cut the next two symmetrical parts of the bird body.

In the below photo, you can see all of the parts that I cut from cardboard laid out together. In the lower right on the black paper, I laid out the parts from the original drawing that was cut apart to create all the pieces necessary to reassemble as the bird. It’s like a puzzle. The larger pieces are on the bottom and you stack and glue the smaller parts on top as you go.

As you think about this step, remember that you will cut the body apart using the largest sections first and work your way to the smallest.
Detailed Notes About Step 3:
- Always cut out the largest part first.I In this case, the top part of the bird, excluding the belly.
- Trace that part twice on your cardboard, and cut two pieces (Remember to flip the template. It doesn’t affect this step, but it’s a good habit to have just in case.)
- From that new piece, trace and cut the next level – here it is the very top edge of the bird.
- Work your way outward – starting with the belly and ending with the wings.
- Do NOT throw away any of the original drawing until you are certain you won’t need them.
- If you make a mistake, don’t worry! You can always tape any sections back together.
Step 4: Planning, Constructing, and Gluing
Once you have all the pieces laid out, plan the construction. Start with the largest parts again. Keep in mind you are creating two mirror images of your original drawing – the front and the back.
Now it’s time for adding the corrugated scraps I mentioned earlier. For each piece of your sculpture, add smaller scraps of thicker corrugated cardboard to the back. This will create more volume to the sculpture with each level you create.
In the below photo, you will see the corrugated scraps added between the layers as the assembly begins.

You will see the cross section of the bird’s body where the mirror images are now glued back to back. With the bits of scrap in between the layers, It’s like a sandwich of cardboard.

Here, you can see the standing body of the bird and the remaining sections.

Step 5: Think Ahead
So now the main body is assembled, consider these steps before you proceed:
- Is the main support of the body stable?
- Should you paint anything BEFORE gluing?
Sometimes, the structure may need to be reinforced to balance and stand up the bird. The easiest fix for a tipsy bird is to give it better feet to stand on. In these photos, the feet of the bird were enhanced with additional pieces of cardboard and hot glue.

You may need to paint some pieces before gluing them together if another layer is going to be placed on top of it. This will also create depth. Here, the pieces of the body details were painted BEFORE gluing.

Step 6: Finessing the Details
This last step is to complete the gluing and add any additional details and textures to the painting.
This photo shows the completed project from a bird’s eye view (pun intended). You can add some thin cardboard and cardstock strips to the exterior edge to cover some the sandwiching elements that are a bit distracting. This is an optional step.
Finally, add any final painted details, and enjoy your finished feathered friend!


Be Brave. Be Bold. Be Amazing!
The Quarantine Crafter aka The Pensive Painter aka The Distant Draftsman aka The Wistful Watercolorist aka The Isolated Artist, Studio Programs Coordinator Michael Carsone