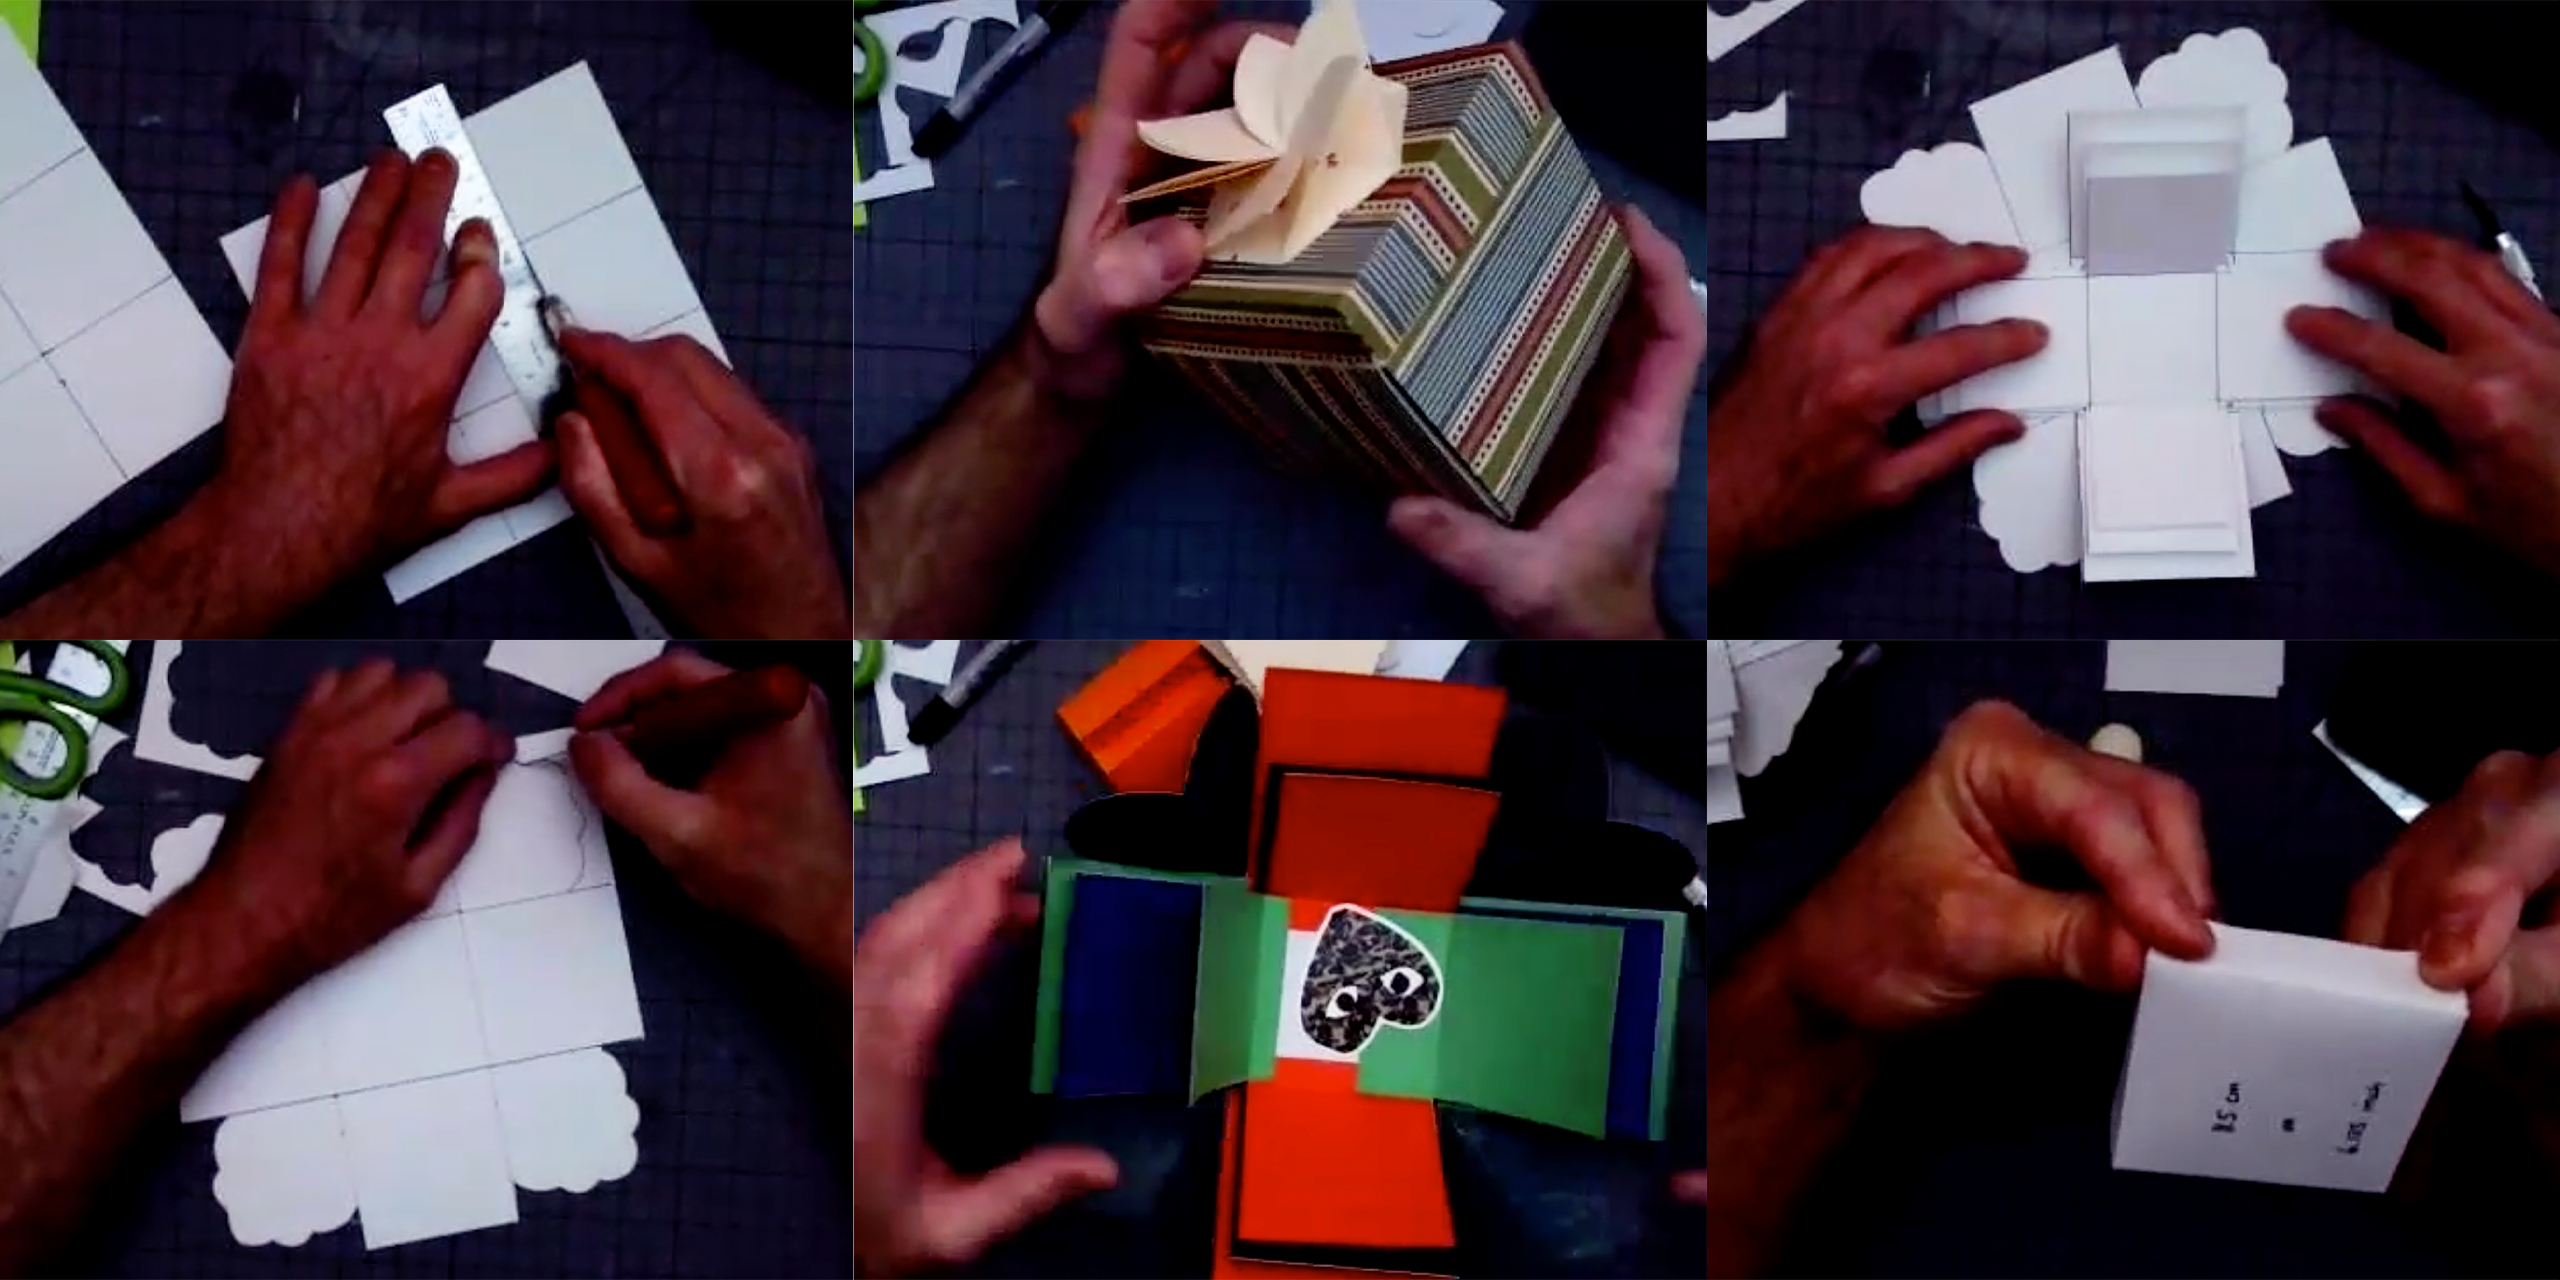
Art Making Activity: Memory Explosion Box
2020 will be memorable in many ways. 2020 high school and college graduates will no doubt have graduation stories unlike the traditions that we have grown to know. Unconventional as they may be – drive-in graduation ceremonies, virtually receiving diplomas, parades to honor students at their homes – our community truly does come together in times of need. This week’s art making project, inspired by our virtual pop-up studio in May, is a little something to honor the recent graduate in your life.
You could opt to create this memory explosion box as a gift to surprise your graduate at the closure of the year, or even complete it together, choosing your favorite photos and mementos that signify your most special memories. Even if you don’t have a graduate in your life, you can use these techniques to create a loving message for a wedding, baby shower, birthdays, or any other memory you choose.
Supplies you’ll need:
- Ruler with centimeters
- Cardstock – 8.5 x 11 inch or 12 x 12 inch (5 sheets plus extra cardstock for anticipated cutting errors)
- Glue and/or glue dots
- X-acto knife
- Pencil
- Collected photos, memories, decorative paper or any add-ons your choose
Step 1 – Cutting the Paper
First, you will need to cut the cardstock into pieces to use as the components for the box. You will be using an X-acto knife and a ruler to trim the squares into the measurements listed below. If the cardstock you are using is 8.5 x 11 inches, it is important to have a ruler with centimeters. Whichever cardstock size you have available is fine though.
8.5 x 11 inch cardstock sizes:
- Trim two pieces of cardstock into 21.5 cm squares (216 mm)
- Trim one piece of cardstock into a 19.5 cm square (195 mm)
- Trim one piece of cardstock into a 17.5 cm square (174 mm)
- For box lid – Trim one piece of cardstock into a 11.5 cm square (115 mm)
12 x 12 inch cardstock sizes:
- Trim one piece of cardstock into an 11.25 inch square
- Trim one piece of cardstock into a 10.5 inch square
- For box lid – Trim one piece of cardstock into a 6.125 inch square
- Keep two pieces of cardstock at the full 12 x12 inch square
Step 2 – Mark the Box Walls
You will now need to draw light pencil lines at the corresponding measurements on each of your cardstock pieces.
Do not use the Box Lid Square cardstock for this step!

For example, for each 12 x 12 inch selection, make two marks horizontally at 4 and 8 inches on each side. Using a ruler, connect the points. Turn the paper vertically and repeat these steps to create 9 equal squares.

We are going to divide the rest of the cardstock into 9 equal parts as listed below.
8.5 x 11 inch cardstock measurements:
- 216 mm square – mark at 72 and 144 mm along each side
- 195 mm square – mark at 65 and 130 mm along each side
- 174 mm square – mark at 58 and 116 mm along each side
12 x 12 inch cardstock measurements:
- 12 inch square – mark at 4 and 8 inches along each side
- 11.25 inch square – mark at 3.75 and 7.5 inches along each side
- 10.5 inch square – mark at 3.5 and 7 inches along each side
Connect the dots with a ruler both horizontally and vertically, creating three rows and columns. You should now have 9 equal squares on each piece of cardstock, except the box lid.
Step 3 – Marking the Lid
This step uses the same technique as the pieces we just marked, but the measurements are not equal.
Millimeter measurements:
- For box lids measuring 115 mm – mark at 20 and 95 mm along each edge
(After connecting the marks horizontally and vertically you should have 3 columns measuring 20, 75, and 20 mm)
Inches measurements:
- For box lids measuring 6.125 inches – mark at 1 and 5.125 inches along each edge
(After connecting the marks horizontally and vertically, you should have 3 columns that measure 1, 4.125, and 1 inch)
The result should look similar to this:

Step 4 – Cutting and Scoring the Walls
Choose ONE of the large pieces of cardstock that you marked earlier. We are going to be removing sections and scoring this piece, as shown below

When scoring along the dotted lines, lightly graze the surface of the cardstock so it indents the paper, but does not cut the whole way through

Don’t throw away the squares that you cut out! We will use them in the next step.
Flip the final piece over and fold the walls up to make a box.
Repeat these steps with the two smaller pieces that we marked earlier. The smaller boxes will nest inside the bigger boxes in the final product.

Step 5 – Cut the Outer Box Walls
Grab the other sheet of large cardstock that we did not cut earlier.
Using one of the large corner squares removed from the wall in the previous step, draw the shape that you would like to use in your design. It can be anything you like, but hearts and graduation caps are popular and fairly simple. This will be used as a template.

Cut away the areas marked in grey.
Using this template, trace around all four of the corner squares of your large piece of cardstock and cut each side carefully, rotating it as you go.

This serves as the outer wall for the box and will eventually hold the interior box


Step 6 – Score the Outer Box Walls
Once you have removed all the grey areas, flip the sheet over and score the walls from corner to corner using your ruler and knife. Be sure to not cut the whole way through!

These scored lines will help you to fold the box in the next step

Step 7 – Fold and Fit
Next, we are going to fold on all the score lines.

The outer box will have VALLEY FOLDS, they face away from you, on the black lines
The red lines will be MOUNTAIN FOLDS, they face towards you.
Place the other three interior boxes in the center and fold up to create the box. They will have VALLEY FOLDS away from you.

Step 8 – The Box Lid

Make sure the scored side is facing down, and carefully make folds along those lines. It will help to cut through one of the lines to make a flap that can be glued.

Use glue to adhere the four corner flaps.
Step 9 – Styling Your Exploding Memory Album Box!
Now that the technical part of the project is completed, it’s time for you to create your album! Using photos, collected memories, and other various decorative elements, you can create the design of your choice.
Some suggestions include:
- Use glue or glue dots (best for photos) to affix pictures directly to the box walls
- Create envelope-style pockets on the walls using extra paper to hold notes or photos


Create various styles of folding walls that fold out to reveal more messages and pictures
When you take the lid off of the box, the interior walls will open to reveal your favorite memories and photos.
Be brave. Be bold. Be amazing!
The Quarantine Crafter aka the very isolated artist aka Studio Programs Coordinator Michael Carsone