Art Making Activity: Relief Style Cut-Out Art
Enjoy this art making activity created for you by the Museum’s Studio Programs Coordinator Michael Carsone! Read on for Michael’s explanation behind the inspiration for the project and his step-by-step instructions.
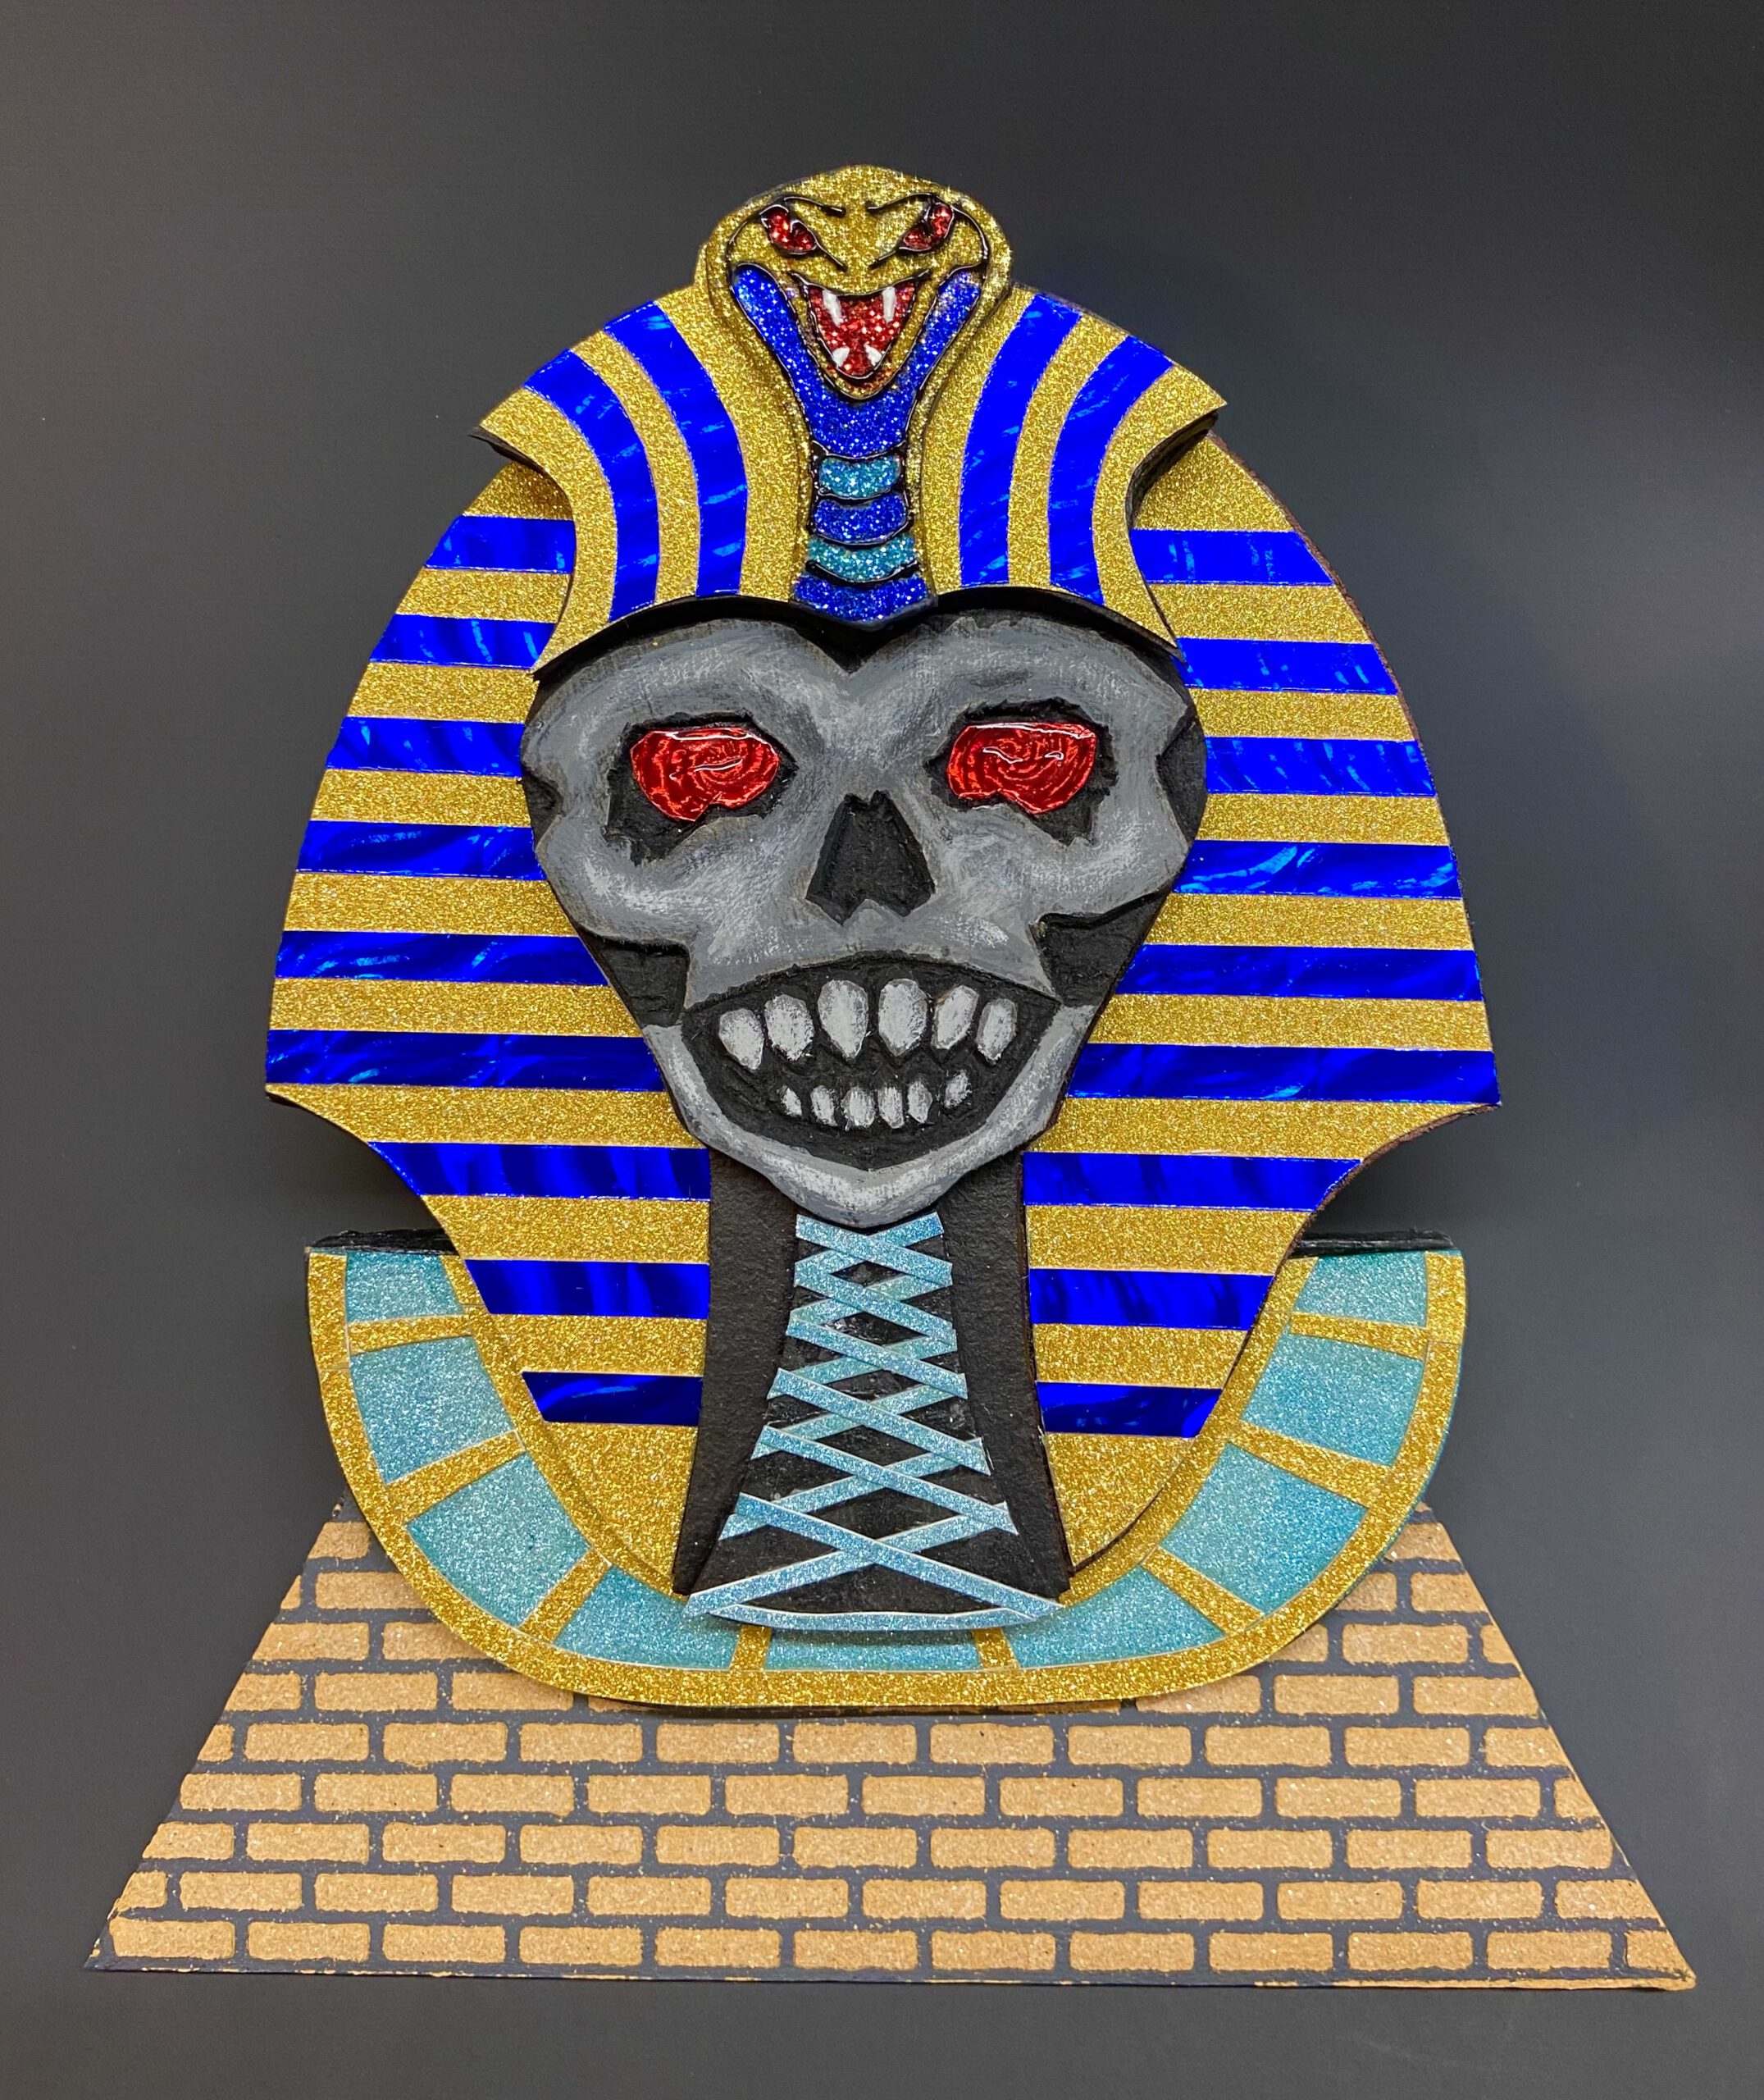
During the better part of 2020 and now almost through 2021, my daughter and I have found many maker projects to create. One of the projects that is a real team collaboration are relief style cut outs. She and I share a love for the Disney ride, It’s a Small World, and for its designer Mary Blair. So far, we have made a lion, a panda, a penguin, an alligator, a panther, and a hippo — all inspired by the ride!

This technique can be used with a variety of materials such as cardboard, foam insulation board, upcycled cereal boxes, even just construction paper. (We used medium density Masonite but that needs cut on a scroll or band saw and white illustration board cut with an x-acto knife.) This technique can also be adapted for more complexity but making a more detailed drawing to create more layers – more on this later!
Materials:
- Paper for drawing the pattern
- Material for the cut-outs – cardboard, construction paper, etc.
- Tool for cutting – xacto knife, scissors, etc.
- Glue
- Paint, crayons, markers, etc.
- Other colored papers for collage (optional)
Instructions:
Step 1
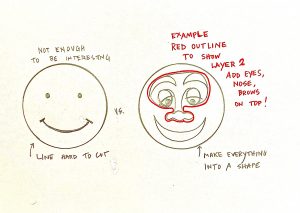
Make a drawing of an object. In this example, only half of the image is needed as we will be using a vertical line of symmetry and cutting it while folded so that one side will mirror the other. The drawing does not have to be symmetrical. It does have to be made of SHAPES that are able to be cut out – meaning just a LINE would be hard to cut out – LINES can be painted or added later. Here is a doodle of how to use more space to utilize the space better to create more interest.

Step 2
The idea is to TRACE each part of the drawing (starting with an outline of the entire object) and work your way through the shapes in the drawing. Each SHAPE you trace and cut out will become a LAYER in the artwork. The more layers you make, the more detail the work will have and the more complex the design will be as well. I suggest planning for a minimum of three layers and use the space well.

Step 3
Cut away from the original drawing from large shapes to small shapes. Trace each part as you go, working though each section of the drawing as you create layers.

Step 4
Save each part of the drawing just in case! In this image you can see how each part of the drawing is cut out but could be reassembled like a puzzle!

Step 5
Once all the pieces are all cut out, it’s a good idea to number the back of them so nothing is missed as you progress in the work.

Step 6
Next you will add paint or marker or collage colored paper to your design. Keep in mind on each layer, you will only need to add the color to the areas that will not be covered by the following layer up! I only used paint on the black areas and collaged foil papers on the rest of the pieces.

Step 7
After all the layers are complete and dry, check your numbers and assemble in order. Use glue liberally to be sure pieces will stick and I recommend placing a book on top of the layer as you go to assure sticking and prevent it from rolling up on the edges. Give each layer a bit of time to dry and stick before proceeding to the next.

This image shows a side view so you can see how the layers “stack up” to create the relief style.

Happy Making!