Art Making Activity: Lion Marionette
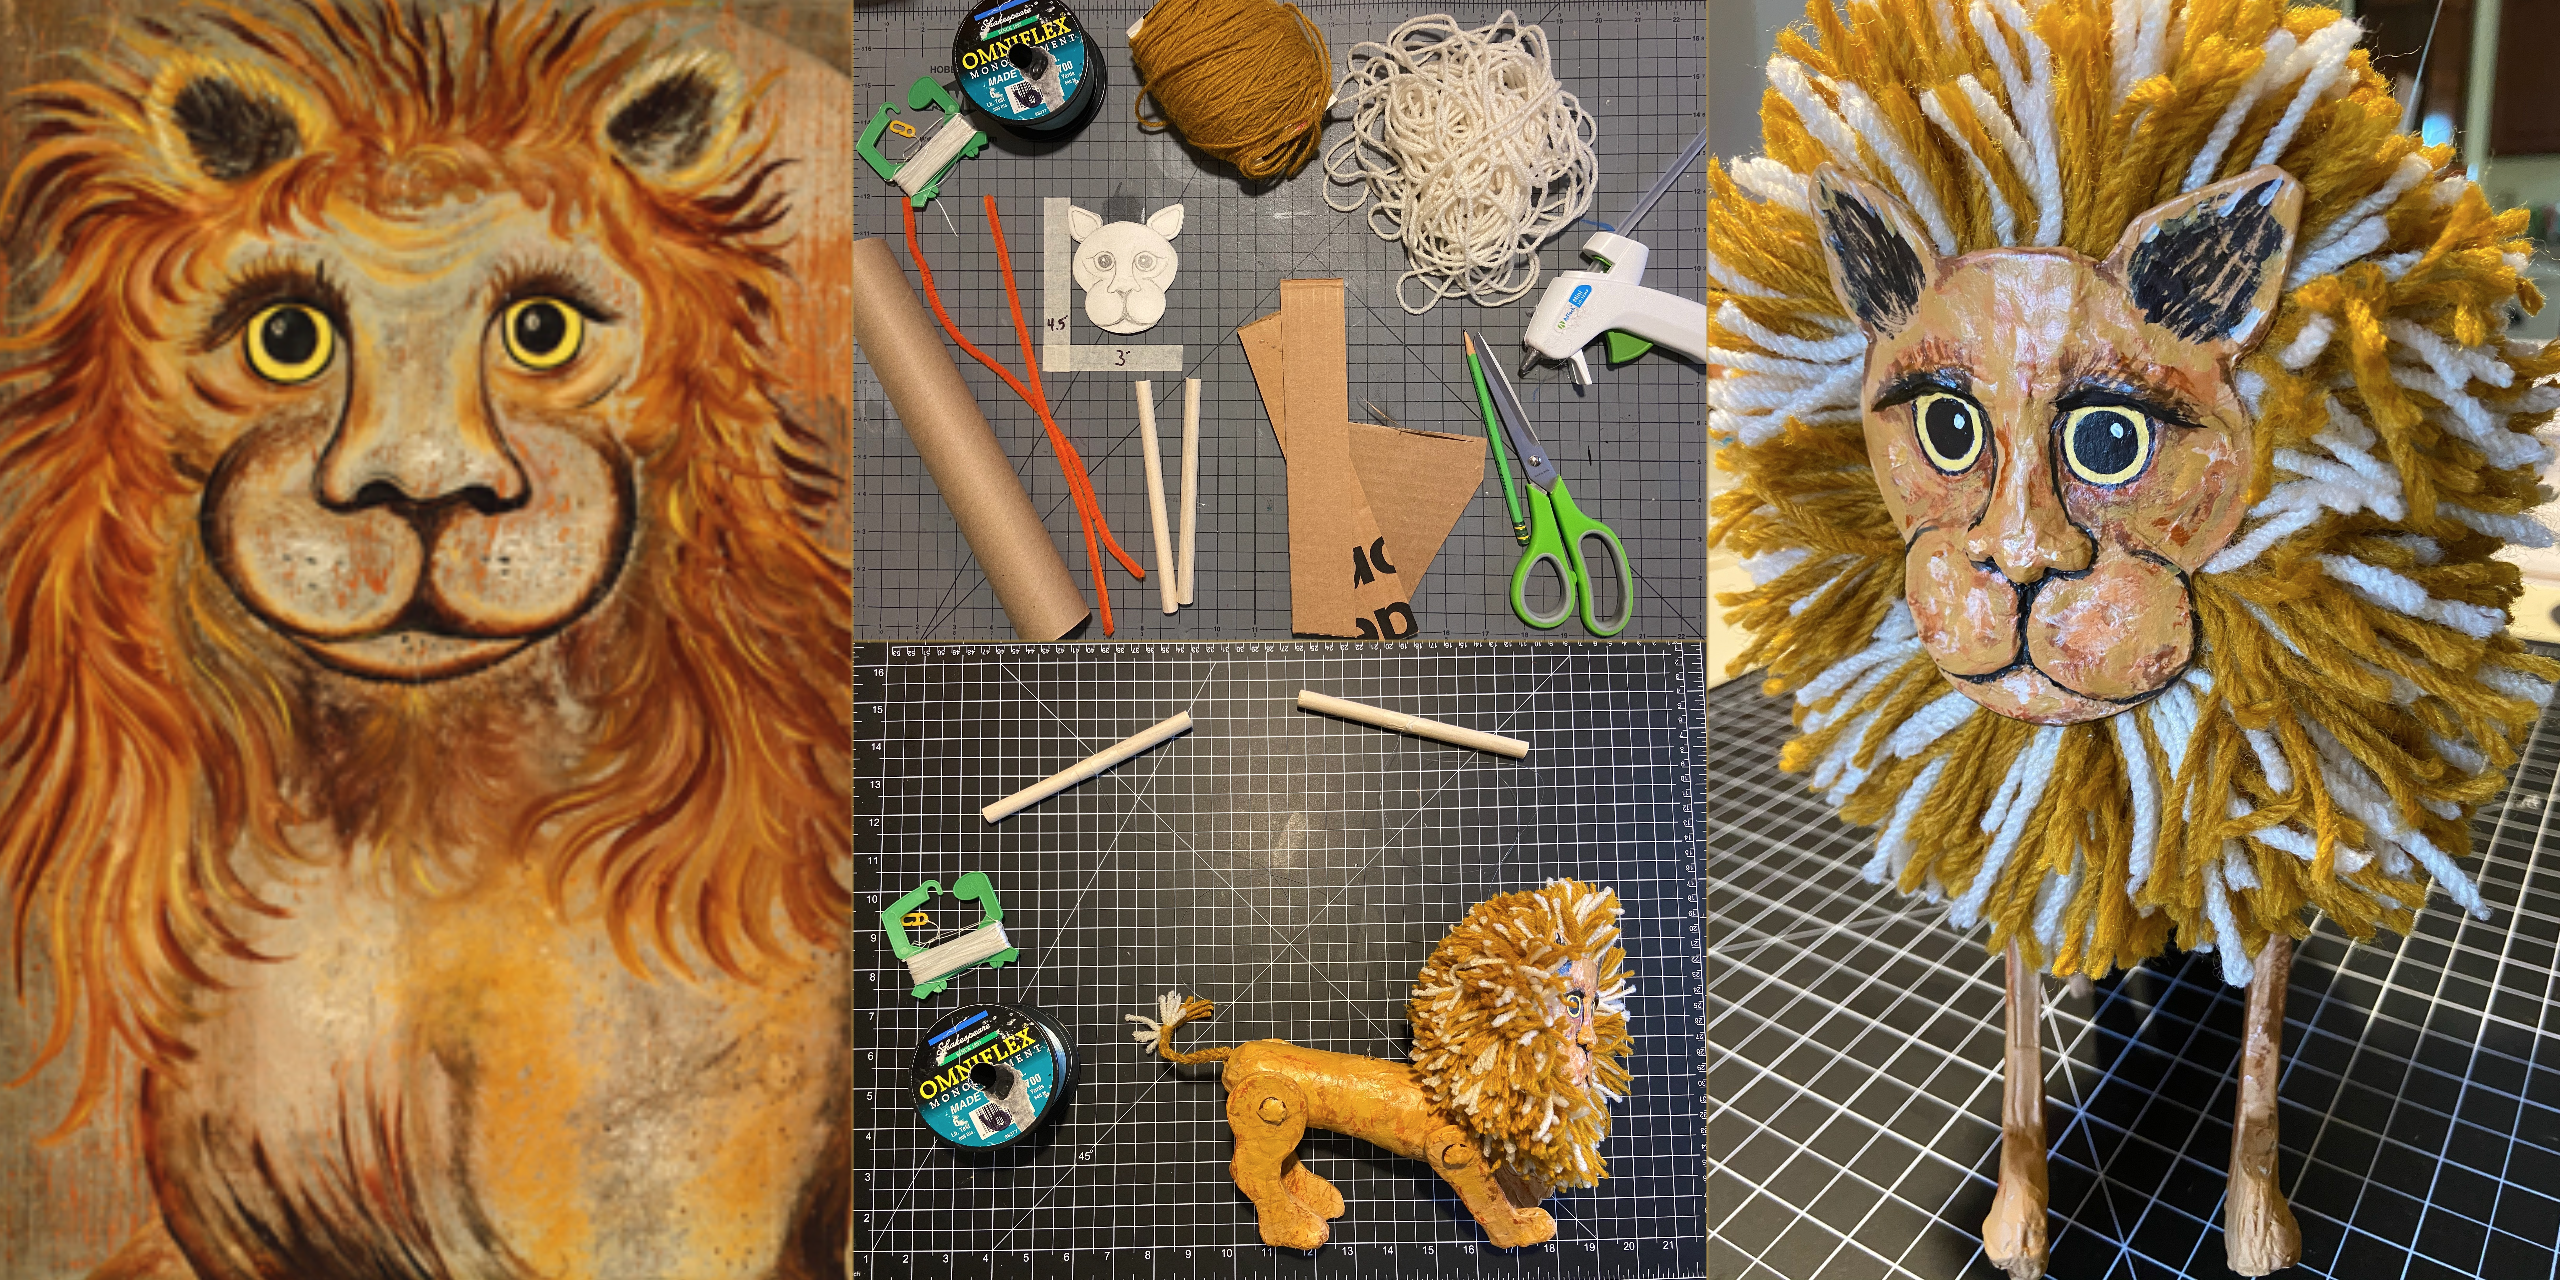
Art Making Project: Lion (actually any four-legged pal) Marionette!
This week I attempted to create a simple marionette style puppet, using simple materials you probably have at home or could acquire easily. For this week, I would highly suggest reading through all of the steps before starting this project!
The STEPS:
Step 1
Collect the supplies: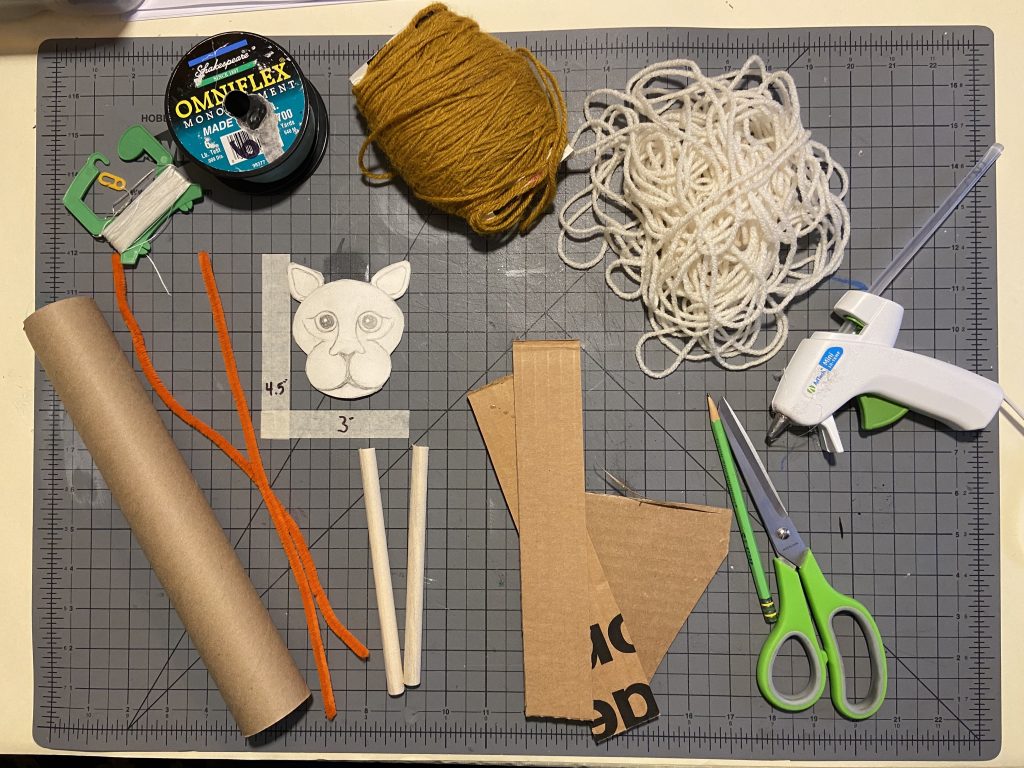
- Cardboard for legs and the head
- Yarn
- Paper towel tube (1)
- White glue
- Tape
- Colored paper (or you can paint if you use white paper)
- Pencil
- Scissors
- 6-inch sticks or dowel rods (2)
- Thin twine (I found an old kite string) or fishing line
- Pipe cleaners (a few)
- Buttons (4)
- Wire or paper clips
- Hot glue and hot glue gun
A note on color: totally subjective for the paper (or paint) and yarn! Make it fun!
Step 2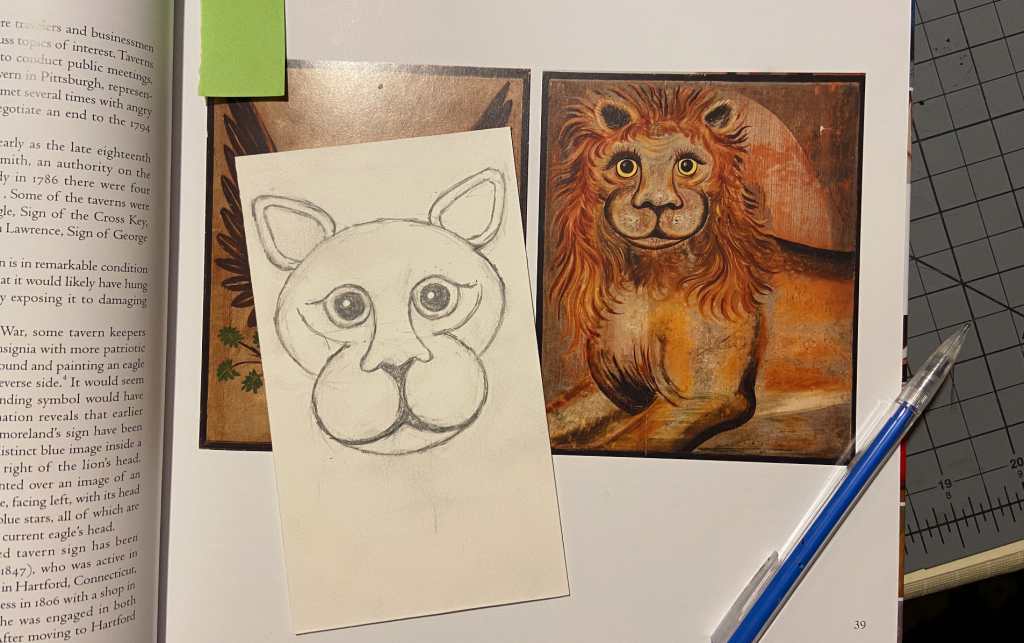
On a small scrap board, draw a face (approximately 4” x 4” is a good starting point of reference). I drew the Lion, but you could create any four-legged animal in this project. However, if you choose a different four-legged animal, you will have to figure out how to creatively complete the back of the head. For the lion, I intended to use a bunch of yarn to help finish the back of the head. For instance, if you choose to do a tiger instead, you may want to consider coloring or painting the orange and black stripes.
Step 3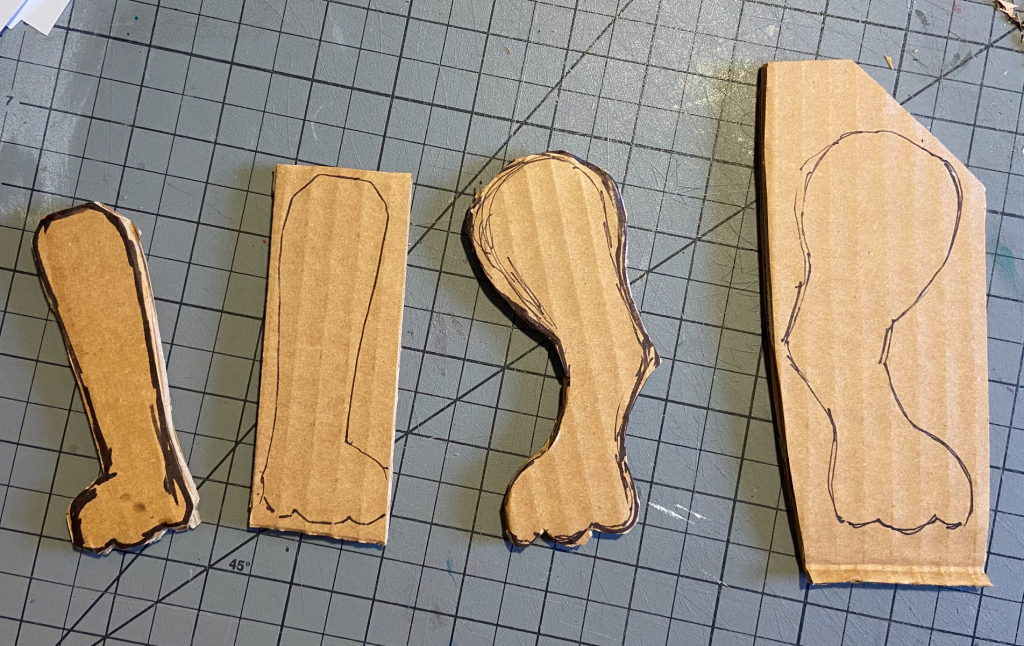
Next plan the legs and the body. The legs were drawn on cardboard. I drew and cut one front and one back. Flip them over, trace and cut those out. I also trimmed down the cardboard tube to fit the legs. A note about proportions and scale: as this was intended to be a puppet, I wanted the head to be exaggerated, which you will see in the completed work, but this a subjective choice. As you plan, keep all these proportions in mind.
Step 4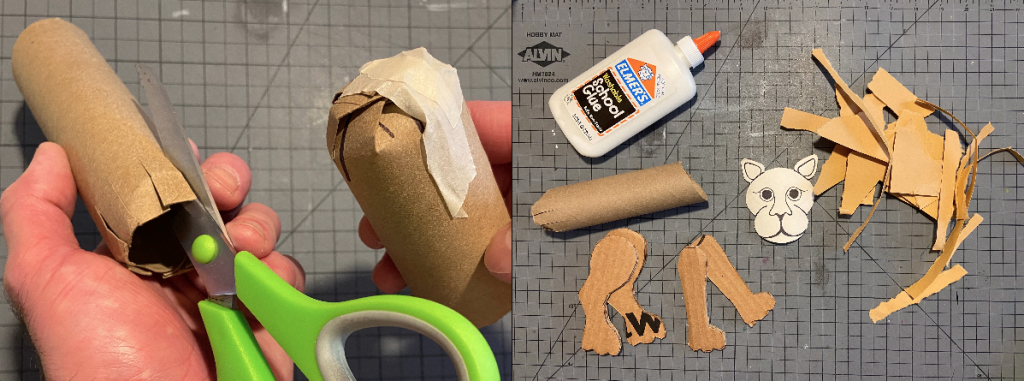
To assemble the body, I cut some darts down into the tubes and used masking tape to taper the ends a bit, so they were not so abrupt. In the photos, I show the darts being cut and then starting to tape the ends. I taped the rear end to round it out, and then with the remaining tube bits, I created a little more shape to the front end of the body. The amount of sculpting done prior to step 5 is again subjective; however, I would note that all your sculpting and taping should be secure before moving on!
Step 5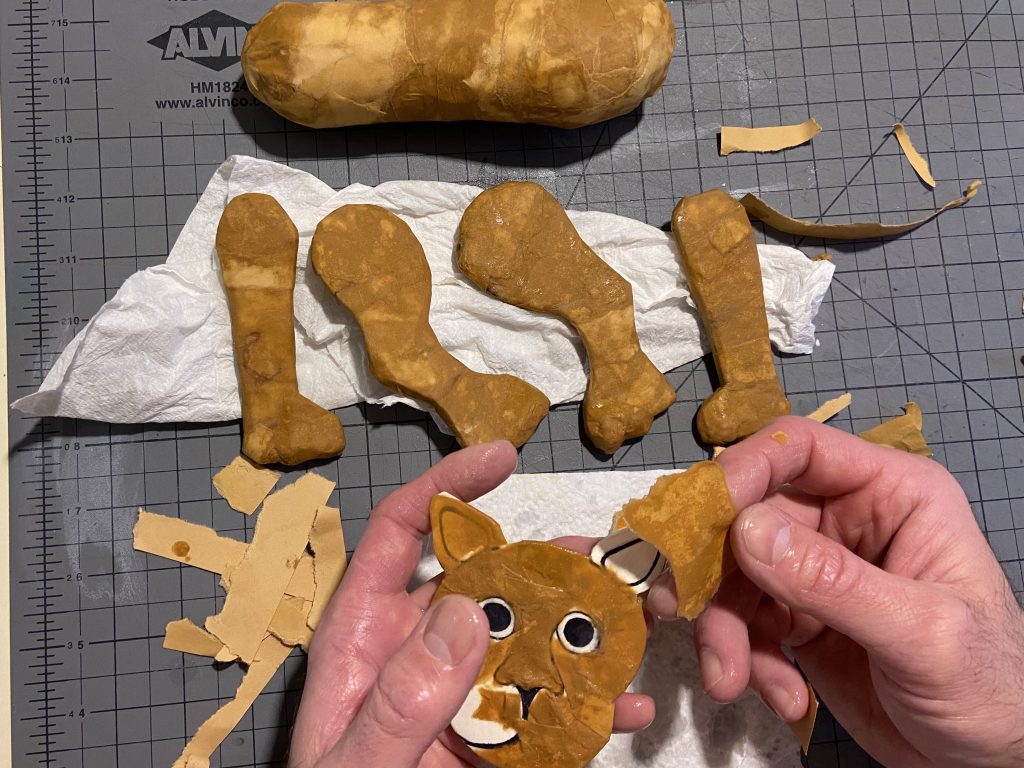
Now for the fun! Use white glue and water to make a mixture about the consistency of a cream soup, not too runny, just a little water will do. You can use your hands or a brush for this step, but ultimately you will get a little messy. Tear up your paper in small pieces of varying shapes and size. I don’t think paper bigger than 2 inches will work well with the sizes we have discussed thus far. Using the paper pieces and glue, saturate the piece, wipe the excess, and wrap the body and legs. Be neat and be sure to rub down edges making certain all pieces stick well. Allow to dry.
At this point, you can paper the face some as in the example or you can plan to paint the face separately. Either way, allow all to dry.
Step 6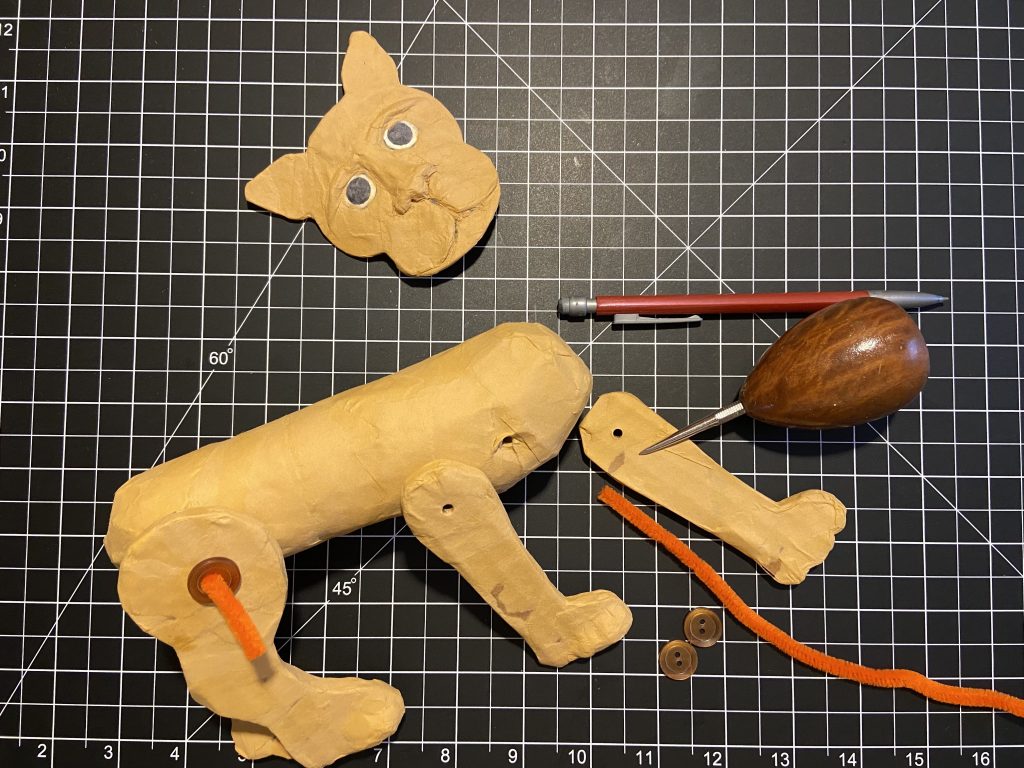
After everything is sufficiently dry, plan the assembly. Poke holes in all four legs and into the body where you want to attach them. I used pipe cleaners as the axle and a button on each leg as the washer to hold it all in place. Twist about an inch of the pipe cleaner into a spiral on the button and hot glue to secure. Do this for all four legs.
Step 7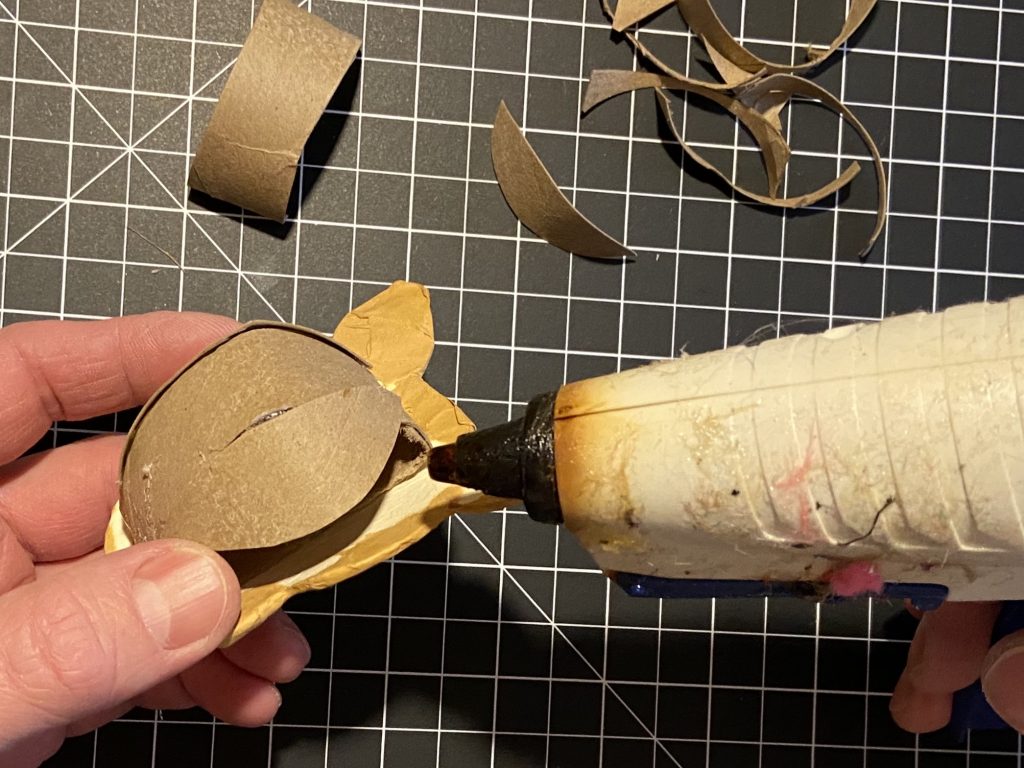
While you have the hot glue hot, I used some of the tube to add a bit of shape to the head by cutting orange peel shapes and hot gluing several of them in place to create the spherical shape to the back of the face plate.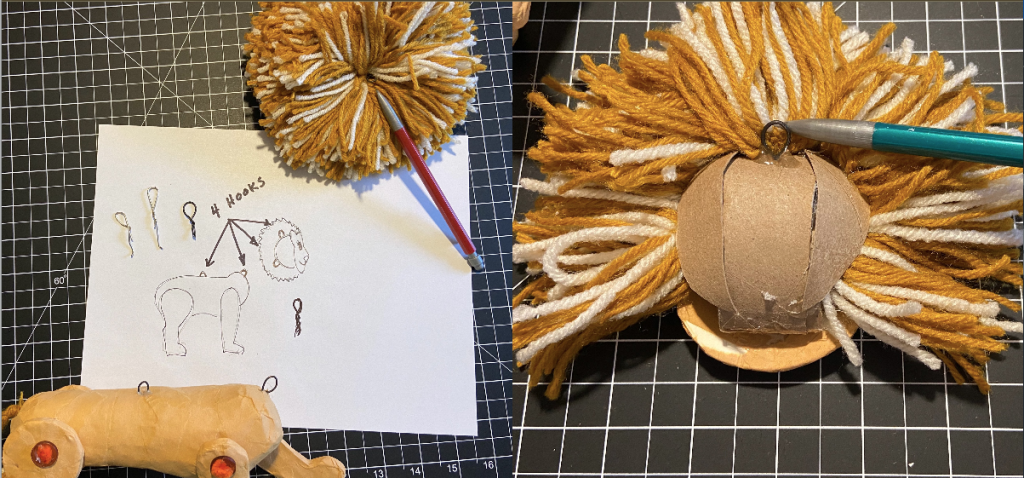
You will also need to affix four hooks using twisted wire or paper clips. See the diagram for placement: one in the center of the back, one on the neck, one where the head will attach to the neck and one for the line on the top of the head. Hot glue as well.
Step 8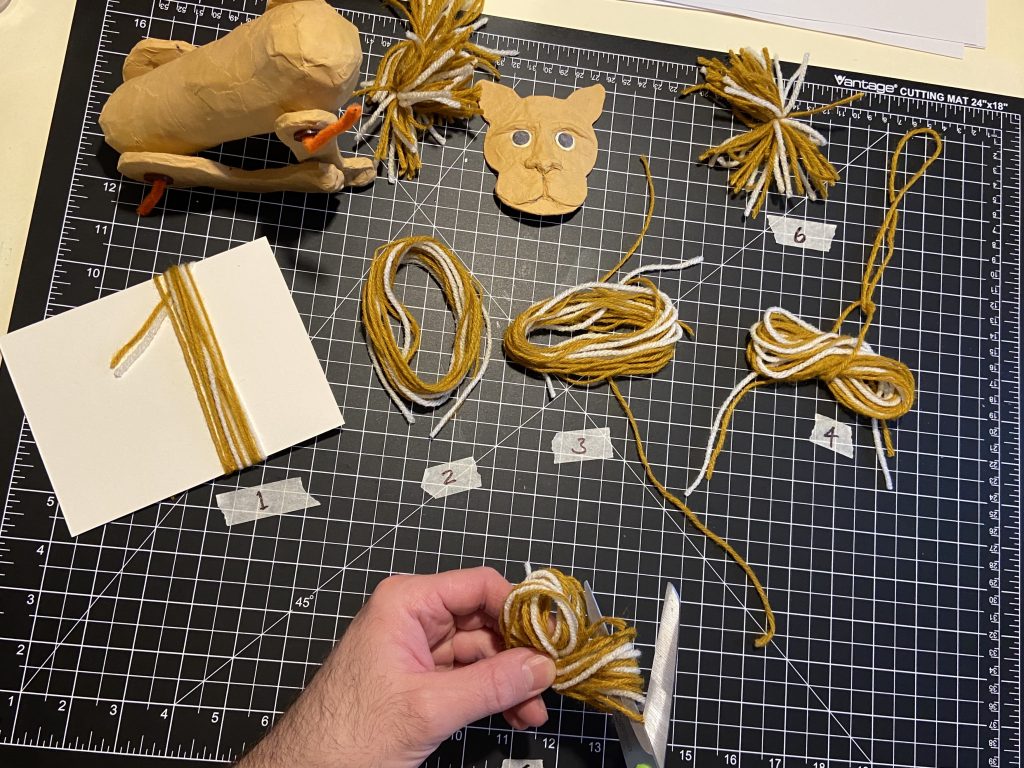
Using the yarn, create ‘puffs’ by wrapping the yarn around a scrap of cardboard. Length is subjective, but keep in mind that you will tie the center so they will only be half of the entire length. In my example, I used 4-5 inches of yarn.
- Wrap the board 8-10 times
- Remove
- Place cut piece of yarn in center
- Tie with double knot
- Cut both ends leaving knot in center
- Fluff
- Repeat as needed, but my example used at least 20 of these! : )
Step 9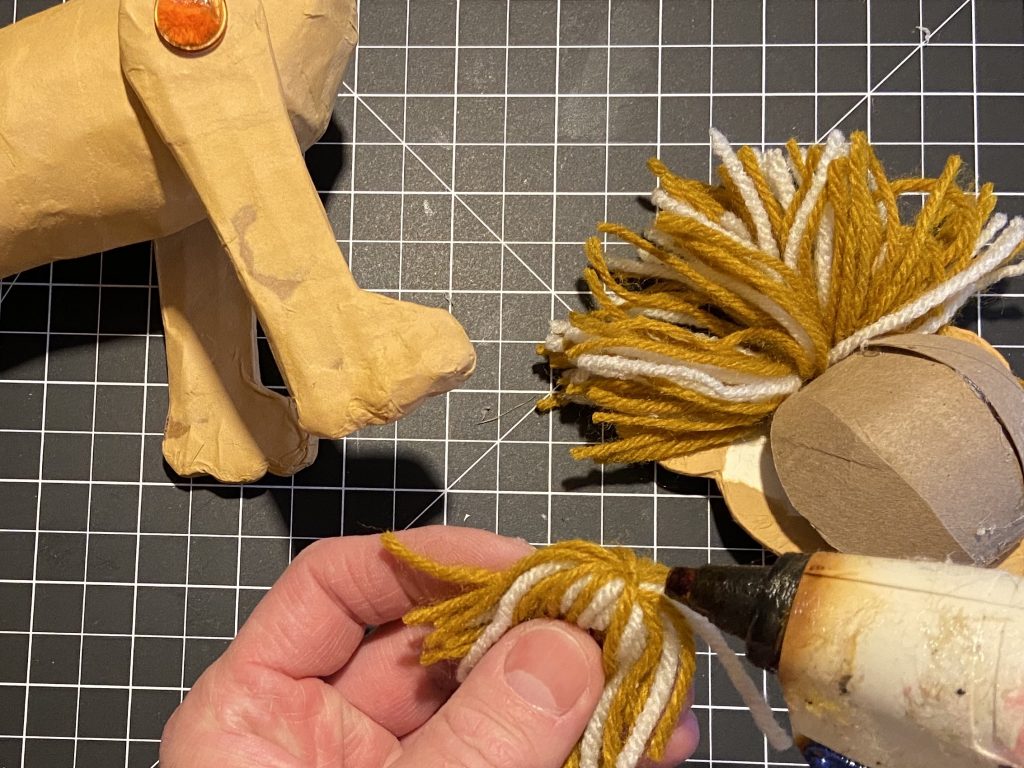
Hot glue to the back of the head. Glue on the knot helps the yarn stay in place as well.
Step 10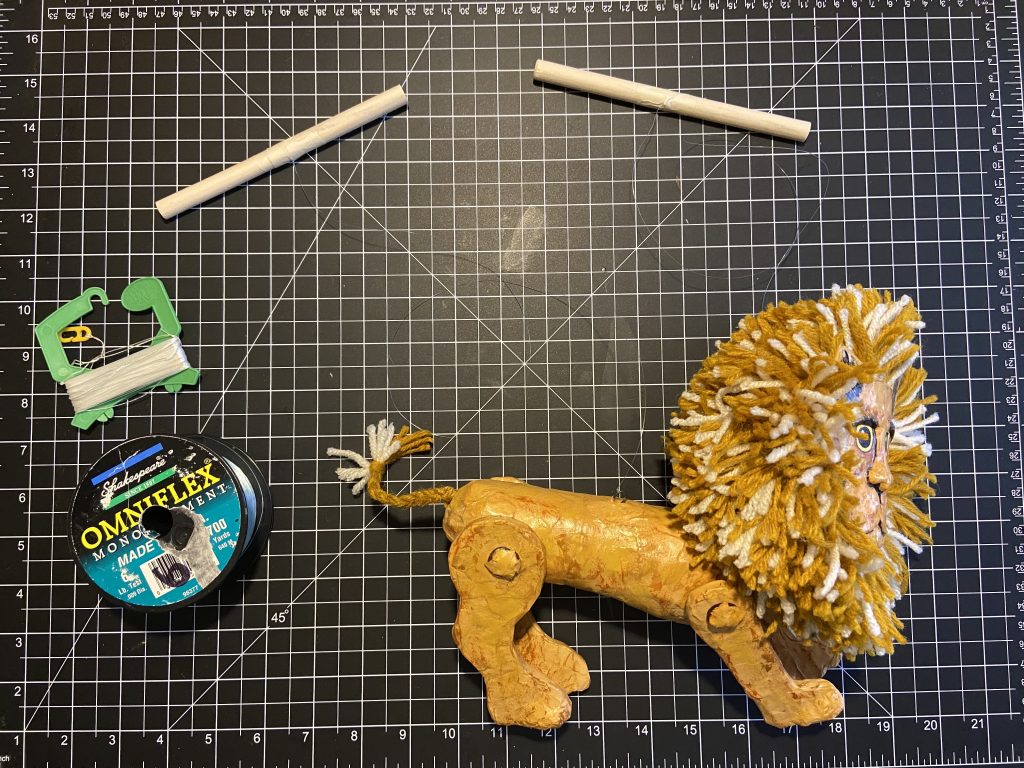
Using the twine or fishing line:
- Tie one end to the wire loop on the back and tie the other on to a dowel or craft stick.
- Tie one end to the top loop on the head and tie the other on to a dowel or craft stick.
I also taped the line on both sticks.
Step 11
The wire loop on the neck and the bottom wire loop on the head can be connected using a pipe cleaner, fishing line or other wire.
Step 12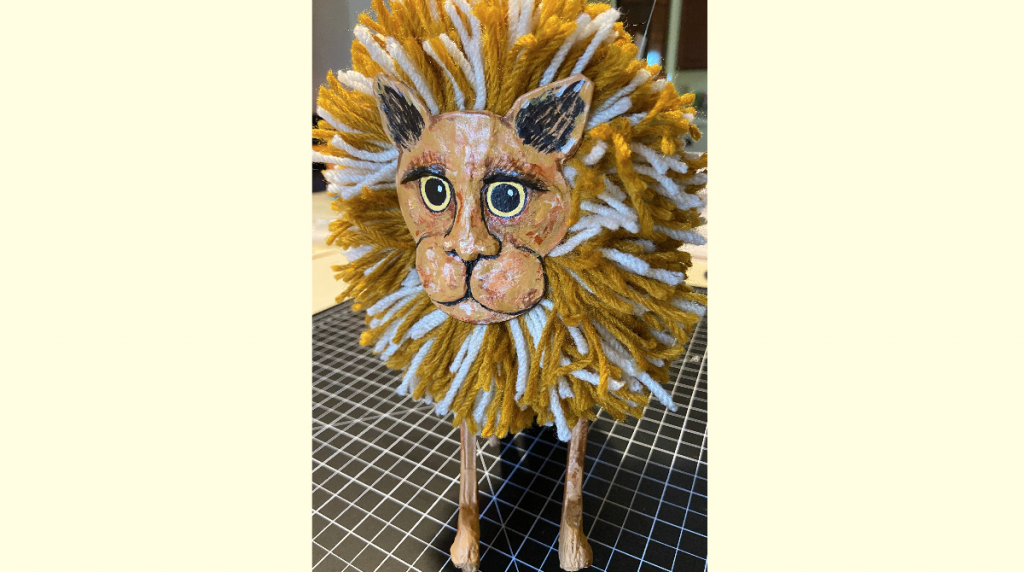
Finally, I chose to add some painted texture to the body and face — optional of course.
Be brave. Be bold. Be amazing!
The Partitioned Puppeteer aka The Isolated Artist aka The Quarantine Crafter, Studio Programs Coordinator Michael Carsone.