Art Making Activity: One-Point Perspective Drawing
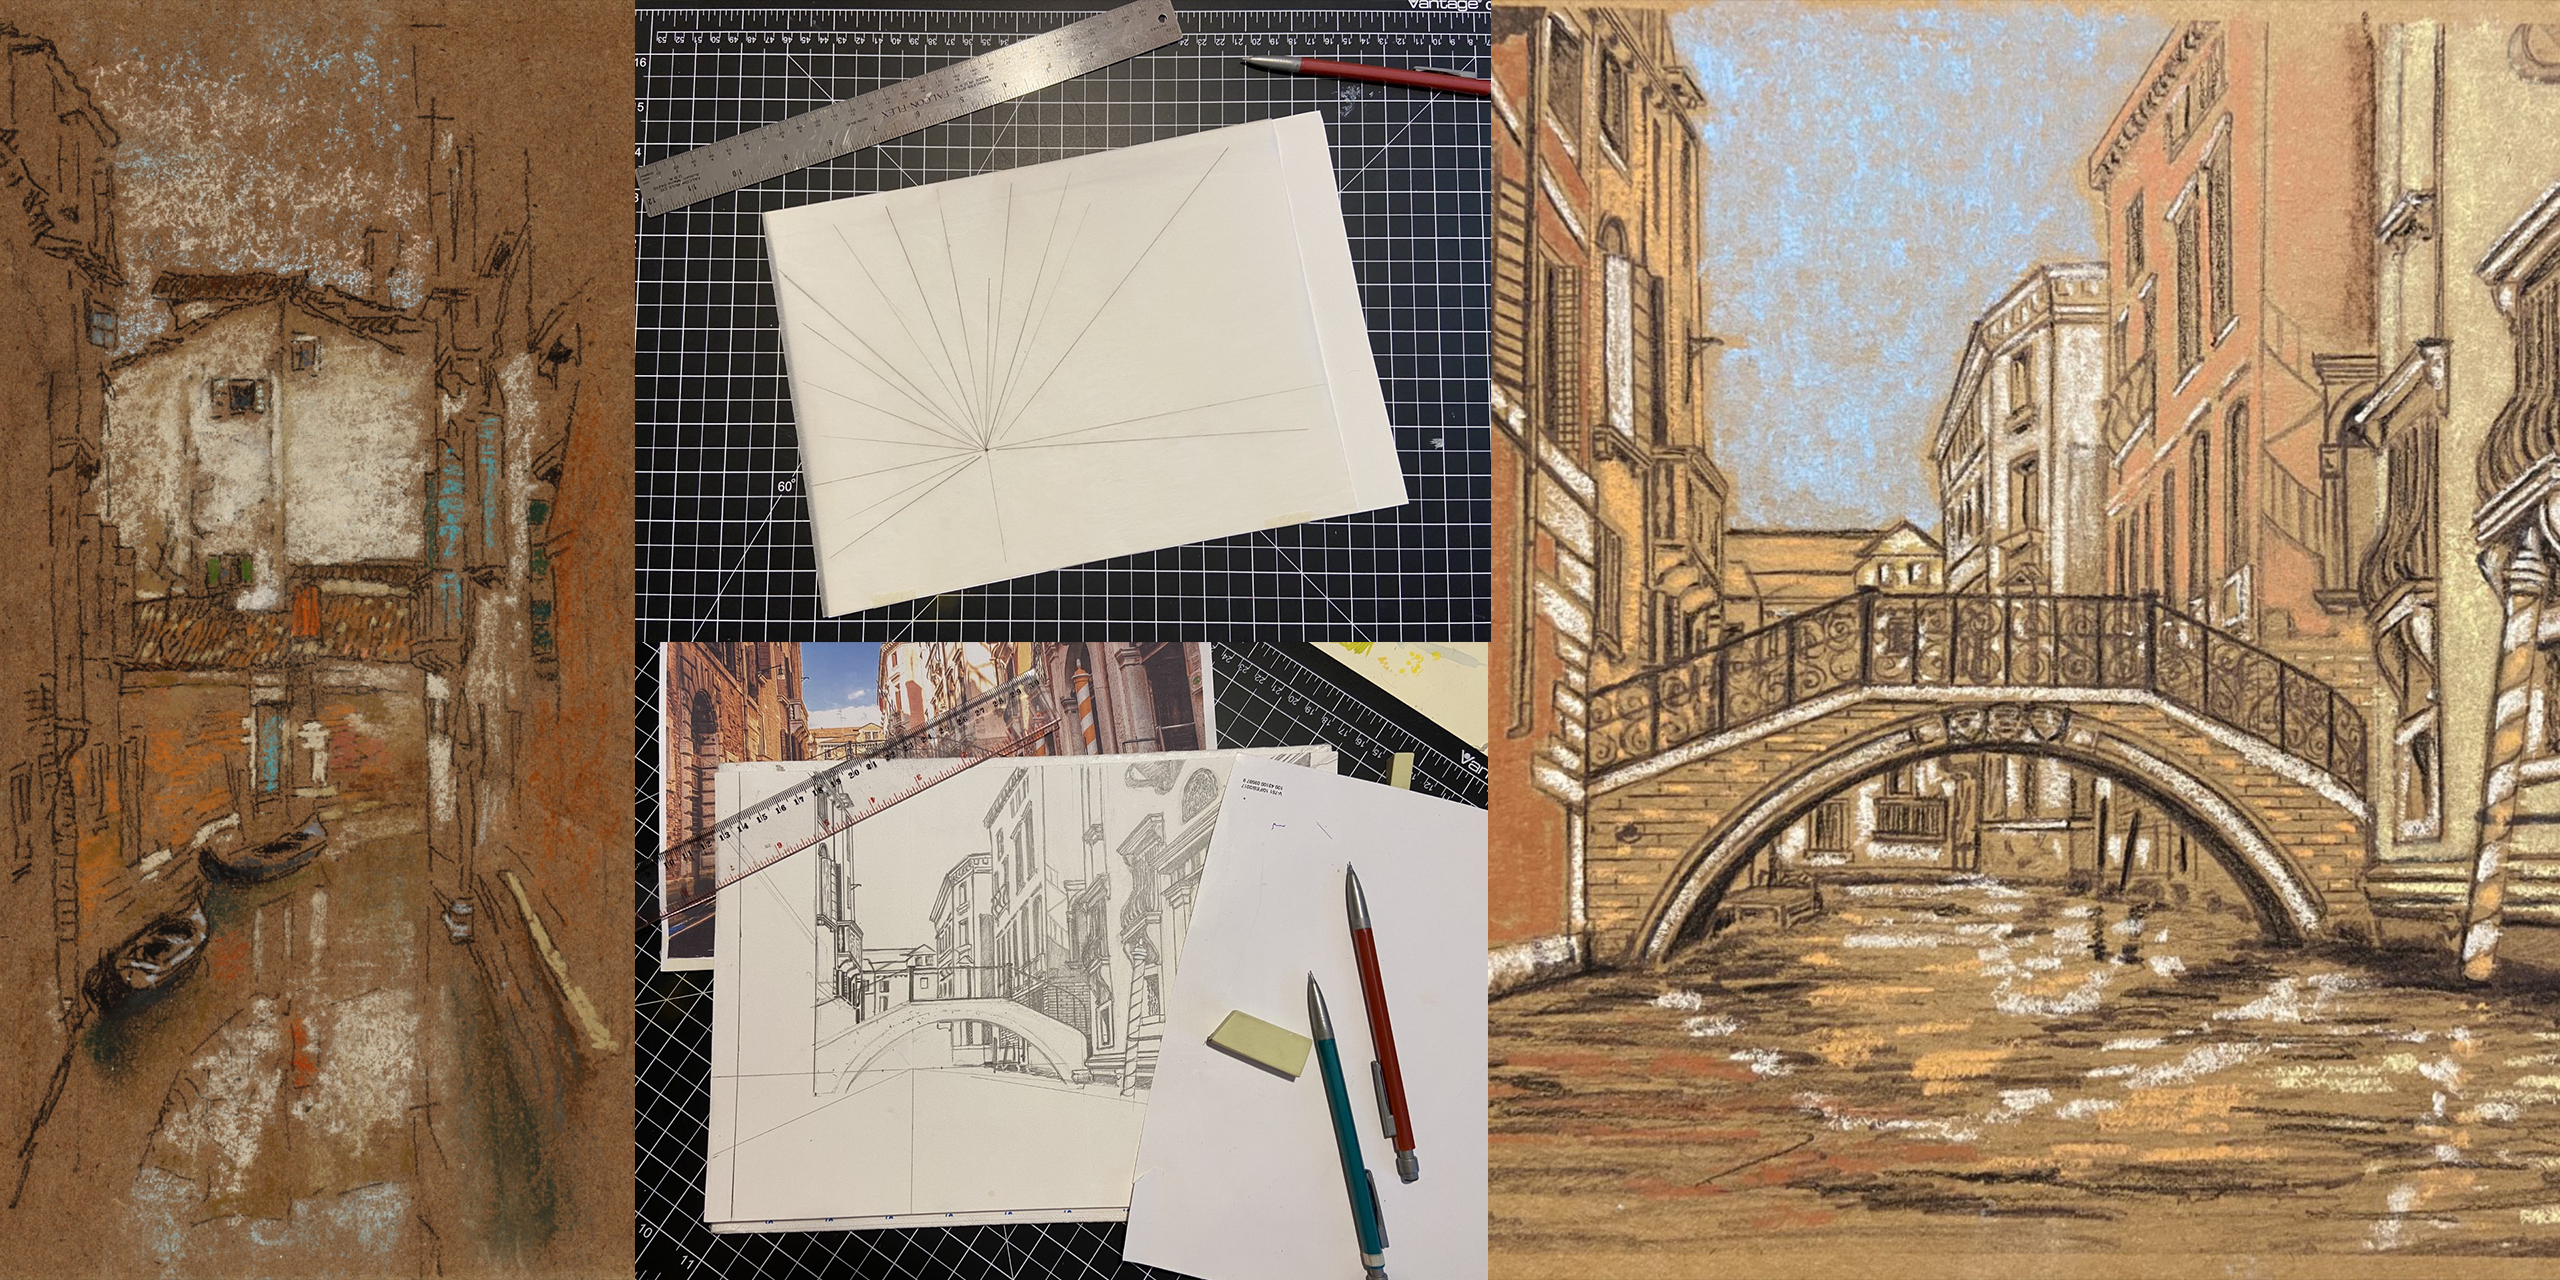
This week’s art making activity is inspired by James Whistler’s drawing, “Canal, San Canciano, Venice” (c.1880). One-point perspective is easy to learn and is a necessary skill for improving your drawing talent.
One-point perspective is a drawing method that shows how things appear to get smaller as they get further away, converging towards a single “vanishing point” on the horizon line. It is a way of drawing objects so that they look three-dimensional and realistic, even though they are on a flat piece of paper (or other drawing surface).
Drawing in one-point perspective is usually appropriate when the subject is viewed front-on (such as when looking directly at the face of a cube or the wall of building) or when looking directly down something long, like a road or railway track. It is popular drawing method with architects and illustrators, especially when drawing room interiors.
Step 1: Choosing Your Subject
To begin, select a reference that depicts a city street, an interior of a room, or a canal in Italy! Google search the term of your choice and you will find many options. You will need to print your reference for this exercise. I printed mine to fit a standard 8.5”x11” paper.
As for other supplies you will need:
- Ruler
- Pencil
- Piece of tracing paper the size of your print
- Drawing paper
Optional supplies include:
- Colored paper – such as brown craft paper
- Soft chalk pastels
Step 2: Finding the Perspective
In this example, the red line is the horizon and the blue lines are the converging lines that create the perspective. Where they all converge on the horizon is the vanishing point.

Lay the tracing paper down over your printed reference image and use tape to “hinge” the tracing paper over your photo. The idea behind using the tracing paper is to create a “spider” drawing over the photo to begin to visualize the structure needed to create the drawing.
Find the horizon line and put a mark on the vanishing point. In my example, the horizon is low on the paper while in the above example it is in the middle of the photo. This will vary based on the perspective from which the photograph was taken.


I have put a piece of paper between the photo and the tracing paper so you can see the “spider” clearly.
Use your ruler and create a drawing on the tracing paper right over the photo. Use as many lines as you feel needed to create the perspective (you can always add more as you go). I suggest starting with the major elements and move to the items of lesser importance.
Step 3: Marking Your Guides

I cut my drawing paper to be the same size as the printed photo. This makes it easier to transfer the same measurements from the tracing paper. Start with the horizon line and mark the vanishing point.
Optional Step:
You will see I included a perpendicular line at the vanishing point as well. I did this for the purpose of making measurements off of the center. This is an optional step.
Step 4: Plotting Reference Points
Plot your converging lines and then plot some reference points for something close to the vanishing point in the center of the drawing. I used the bridge in my image.

If you zoom in on my photo, you can see that I used a Sharpie marker on the tracing paper to plot my points. By making measurements from the horizon and the vanishing point, you can plot anything from the photo to the drawing.
Step 5: Drawing the Skeletal Structure
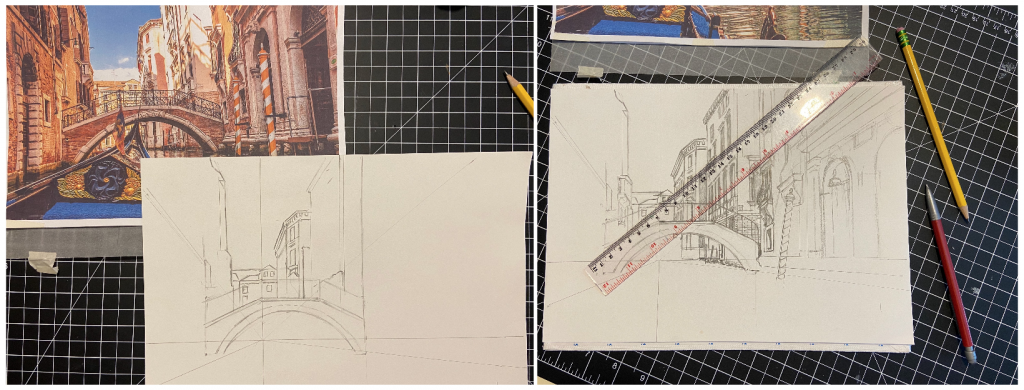
The next step is to create the drawing using this method. Begin measuring and plotting points to create the basic structure of the objects in your photo. I work from the center and move outward toward the edges. Some tips will be for you to lightly draw the “skeletal structure” of the entire photo before committing to details and shadows.
You can also take your drawing paper and place it underneath the tracing paper to check for accuracy on a blank background. Since your photo and drawing will be the same size when completed, this is an easy way to be sure of your markings before moving on.
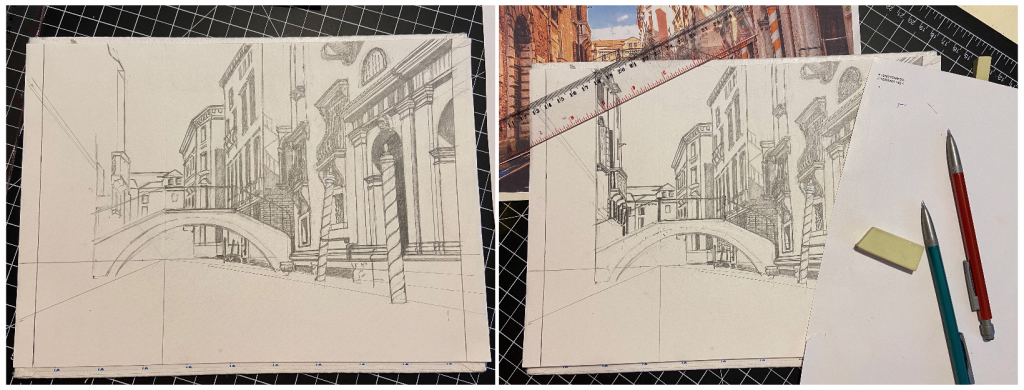
Step 6: Details, Details, Details

When you’re finished with the structure in the drawing, spend some time honing details as well as adding shadows to create an even more realistic atmosphere within the drawing.
Step 7 (Optional): Adding Color and Variations
I like options, and I think that creating is more fun (and maybe more challenging) when you add layers to the process. So, I found some brown craft paper and cut it down to the size of my drawing. I used my printer, which has a copy option, to create another version of my original drawing.


With this version, I used soft chalk pastels and added color to the image. In the end, I think perhaps I should have gone with a “less is more” approach with the color additions! But since I have my original drawing and more brown paper, I still have more options. Try as many variations as you’d like!

Be brave. Be bold. Be amazing!
The Distant Draftsman aka The Wistful Watercolorist aka The Quarantined Quiller aka The Isolated Artist aka The Quarantine Crafter, Studio Programs Coordinator Michael Carsone