Art Making Activity: Paper Quilling
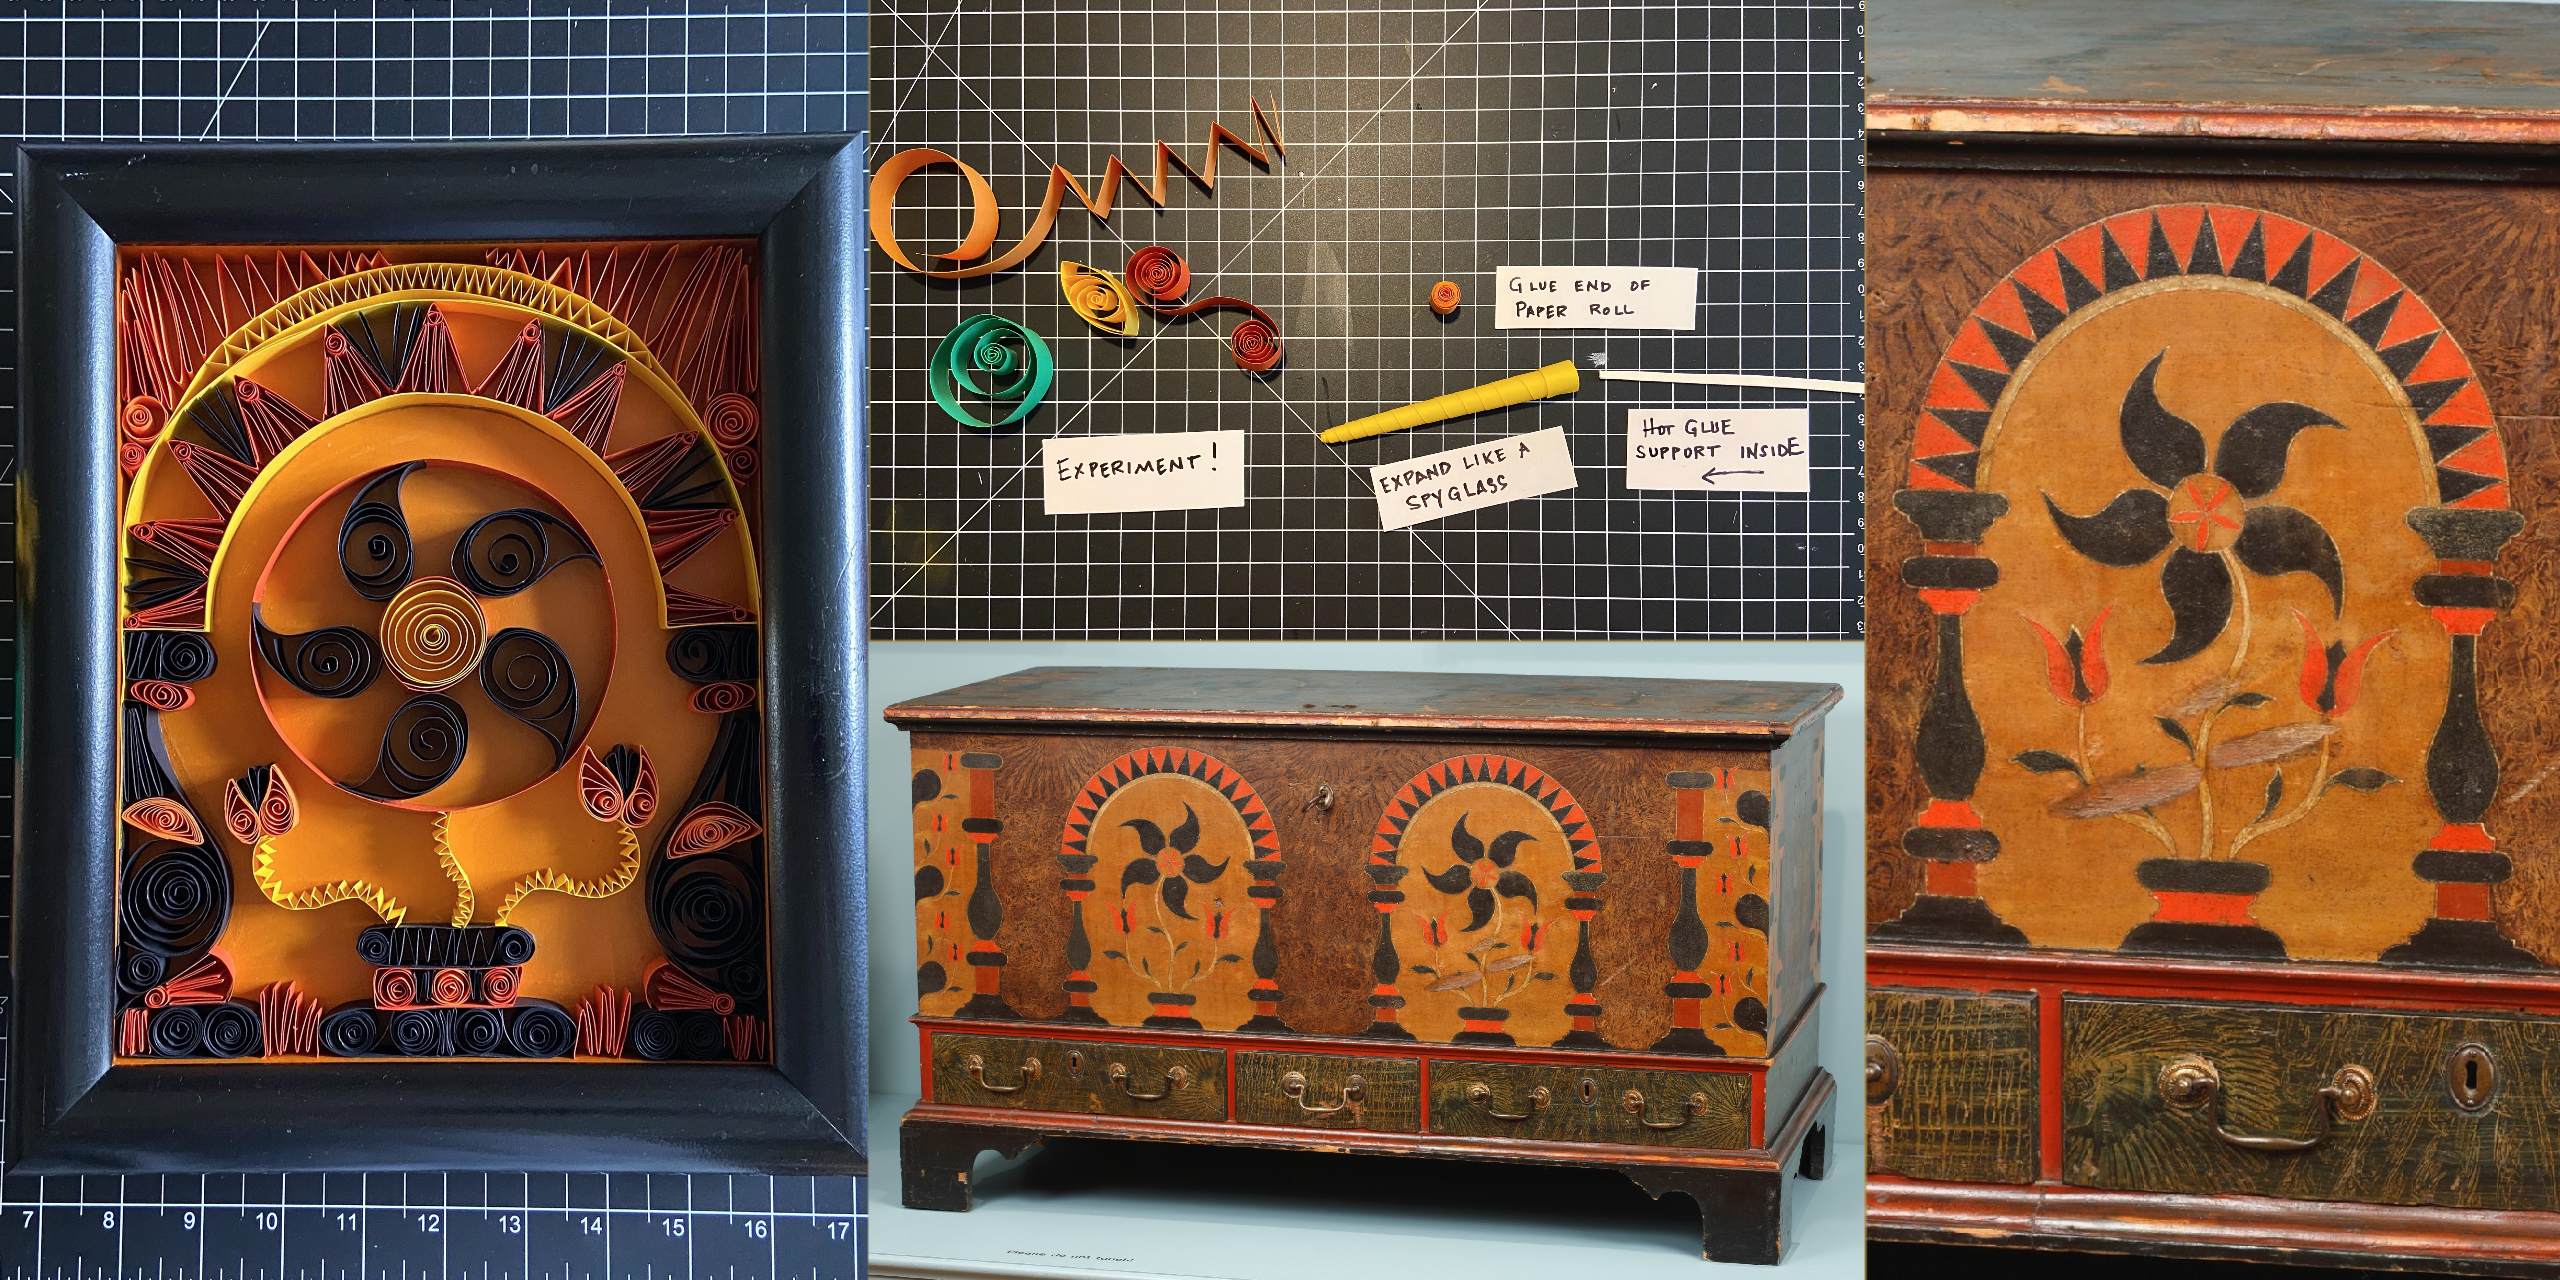
Inspired by this Chest Over Drawers furniture piece in our folk art collection. Looking at the pinwheel-like design of the flower within the columns, I knew I wanted to recreate the design by quilling.
Quilling involves using strips of paper that are rolled, looped, curled, twisted and otherwise manipulated to create different shapes, and glued together to create decorative designs. Quilling designs can be used to decorate greeting cards, pictures, boxes, eggs, and to make models, jewelry, mobiles etc. Quilling designs which can be quite intricate begin with rolling a single strip of paper into a coil and then pinching the coil into shapes that can be glued together.
Some may find quilling to be calming while others may find it to be a bit tedious!
My art activity is a rather larger paper quilling project. Before you undertake a project of this magnitude, you may want to experiment with quilling and practice making simple shapes.
You may have a quilling tool which is helpful, but you can just use toothpicks once you get the hang of it! Also, you can find inexpensive tools on Amazon as well as special pre-cut paper.
Optional Step 1:
To begin, I used the tulip design as inspiration for design and color selection. I knew I wanted to plan for a more complete piece from the beginning, so I found an 8”x10” frame. I used an old gift box and cut an 8”x10” backing piece and (4) 1 inch sides and using hot glue assembled a simple box to create my design.
Step 1
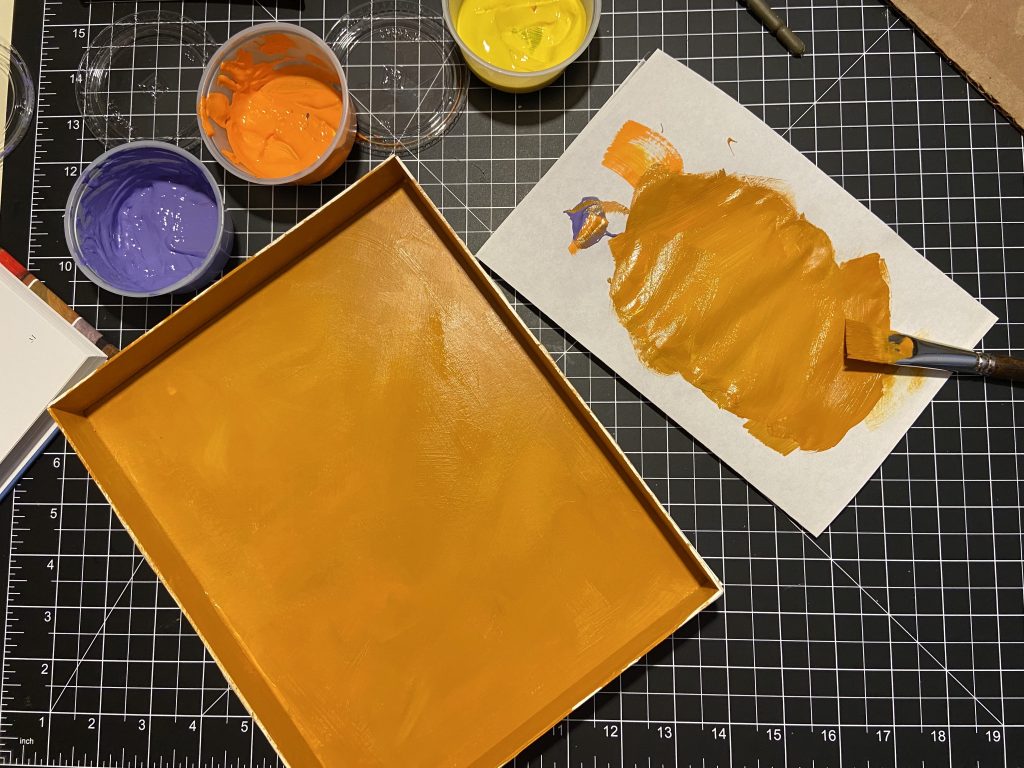
You can use paint or colored paper for the background selection. I chose to create my own color, so I used acrylic paint and coated the inside of the box.
If you choose to use a piece of colored paper, be sure to pre-fit the piece and glue it down really well so you don’t have ‘bubbled’ sections of the paper. It must be flat! Take extra care, spread the glue evenly, and use careful pressure to make sure it is affixed well!
Step 2
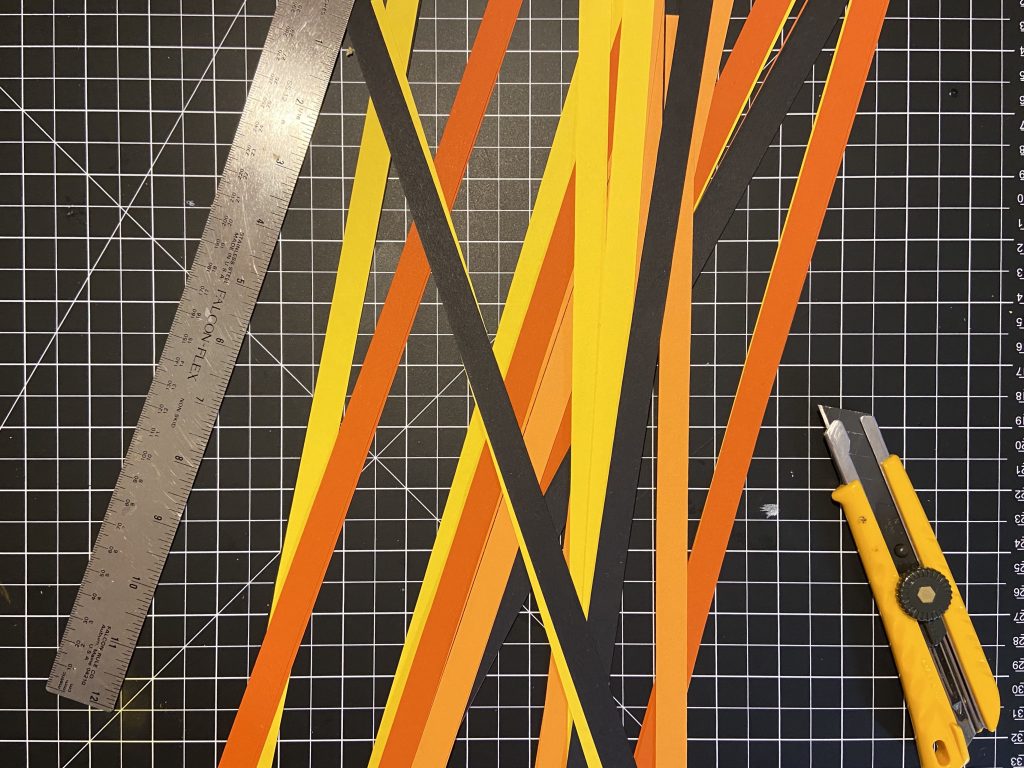
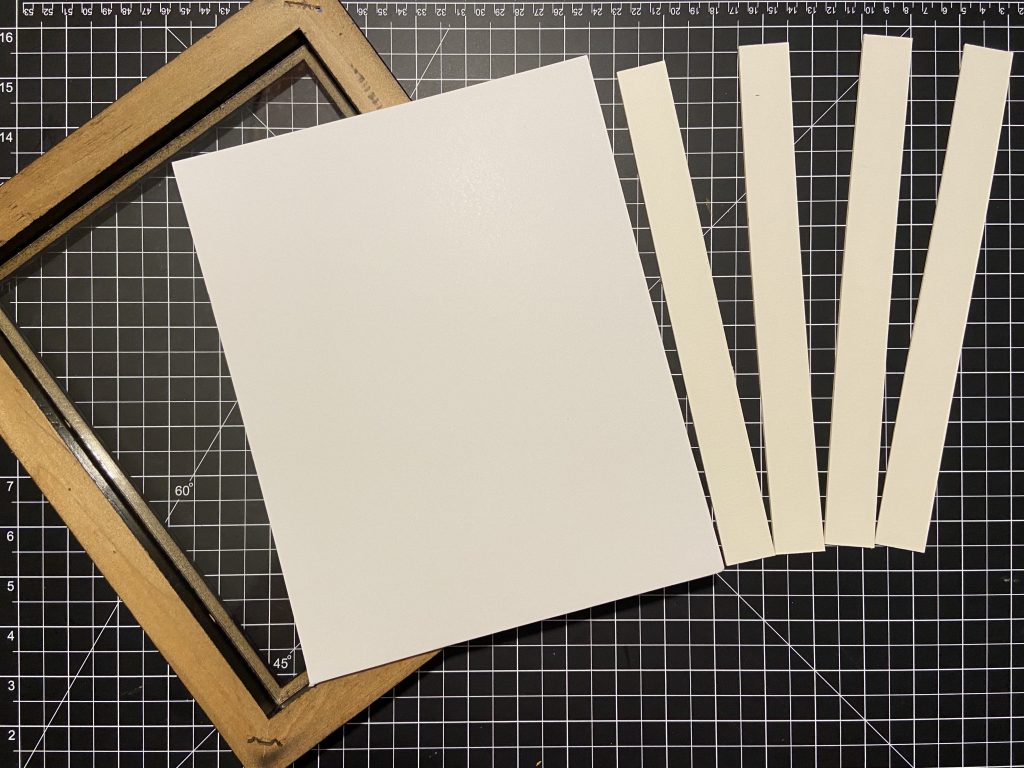
As mentioned earlier, you can buy specific paper for quilling if you want. I used colored paper I had at home and carefully cut the strips using a metal ruler, knife, and cutting mat. Since I created a box that was 1-inch-deep, I cut the paper strips to be a ½ inch.
Quilling strips can be as narrow as 3mm, but when you are just starting out, ½ inch is appropriate.
Step 3
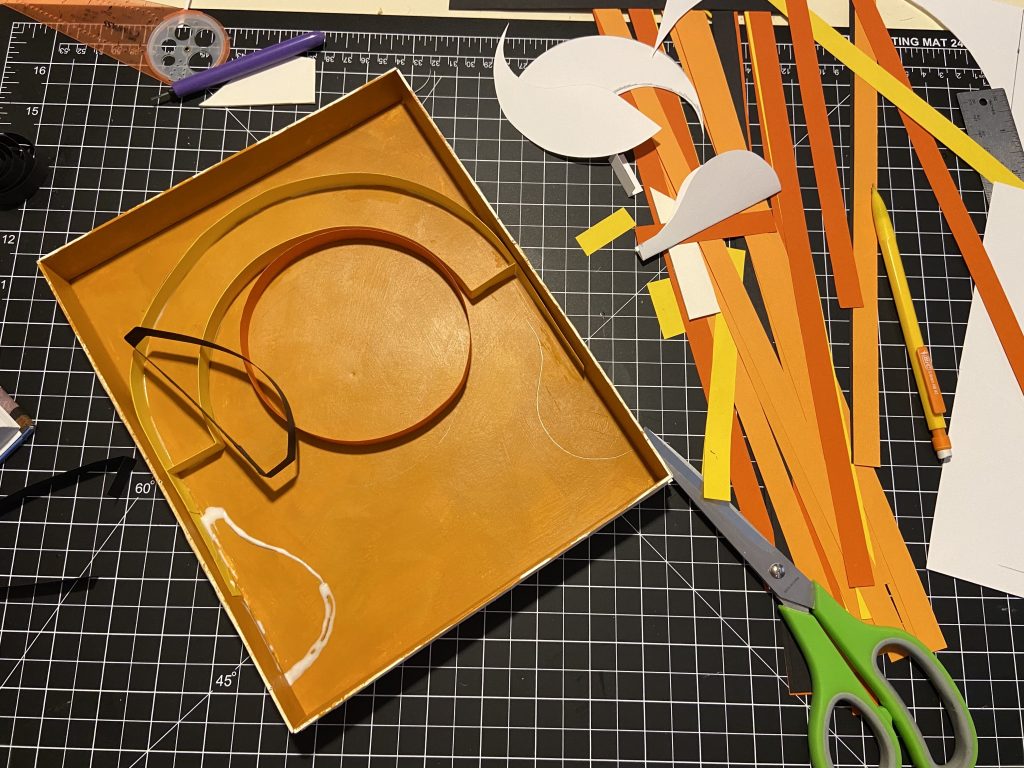
Once the paint in the box was dry, I lightly drew part of the design in pencil in the box. Then I created ‘walls’ using the paper strips to shape out the design.
To glue the walls down, I would recommend using Elmer’s Glue-All or tacky glue because you will need something a little stickier than some glues on the market now. One trick to make your glue a little stickier is to allow the glue to dry a bit before placing the paper to avoid long hold in place times. Another trick is to use scotch tape as a temporary hold and remove once dry, but be careful not to rip anything!
Creating these barricade walls is optional and will depend on your design, but I suggest it as a way to start the process because manipulating the paper without it can be frustrating. Thus the reason why I chose this specific geometric design.
Step 4
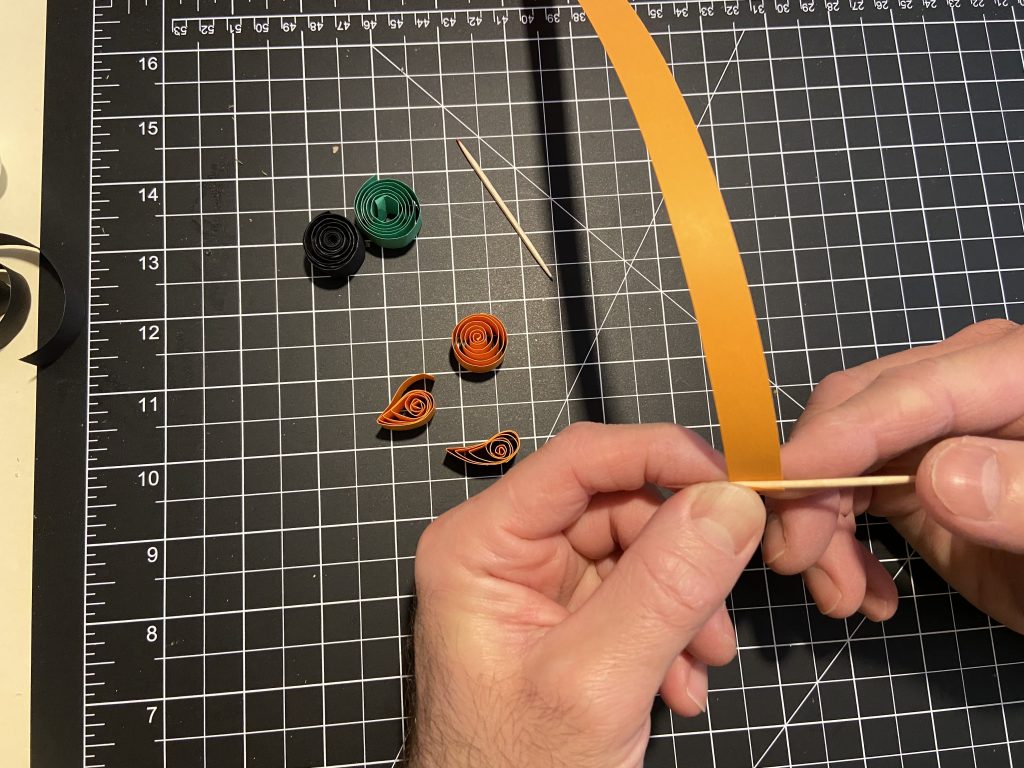
Next you quill the paper! Using a toothpick, practice rolling the paper. There is a definite learning curve to this! Be patient.
Tip: After rolling the paper, slide it off the toothpick and twist the roll tighter BEFORE letting it go! I find it easier to loosen the paper vs re-rolling to make it tighter.
Step 5

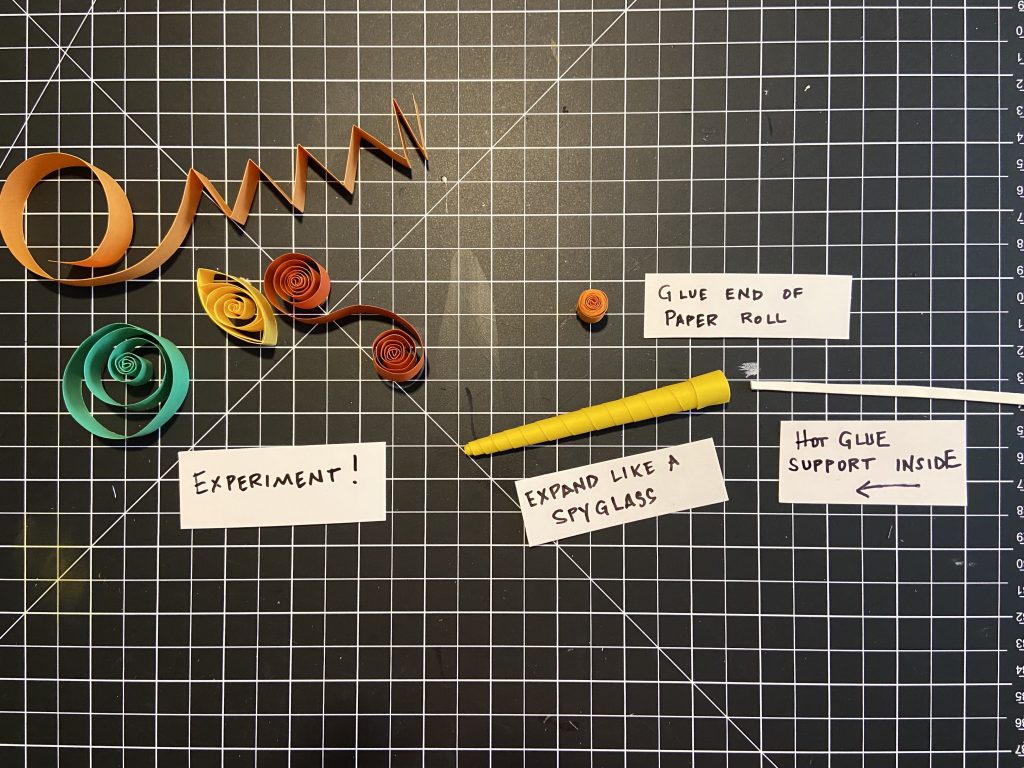
Then roll up your paper colors. Use them to fill your design. You can experiment with how you use the paper rolls, too. I also ‘fan’ folded the paper as well.
Step 6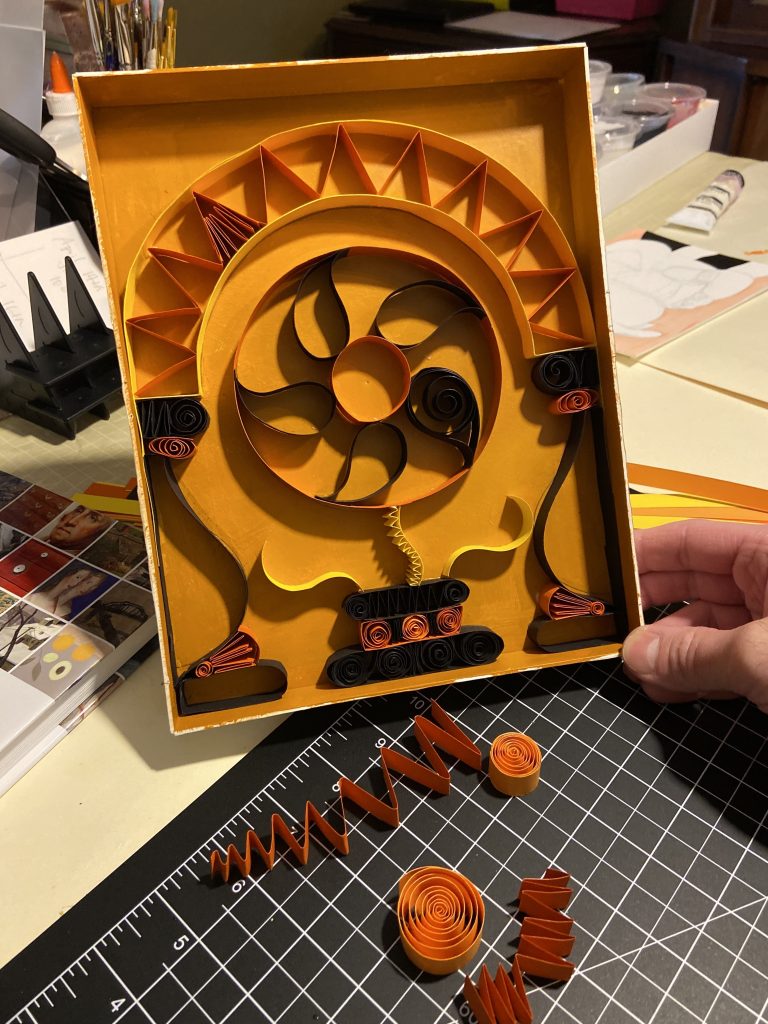
Continue to roll and plan the look.
Before you glue down your quilled shapes, arrange them first and see if your design looks the way you want it to. Only after you are satisfied with your design should you start to glue the shapes in place. Glue all your shapes into place. Let it dry and show off your finished design!
My Finished Quilling Design!
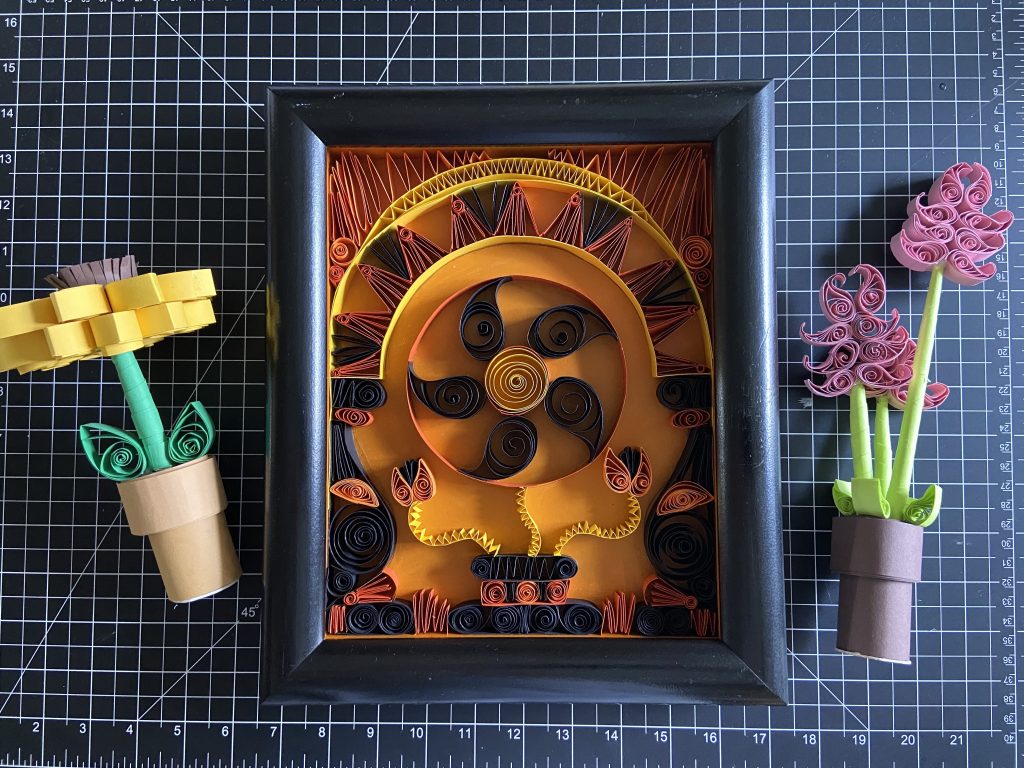
While I was creating this design, my 12-year-old daughter was also quilling paper.
We created stand-alone paper flower sculptures using her designs.
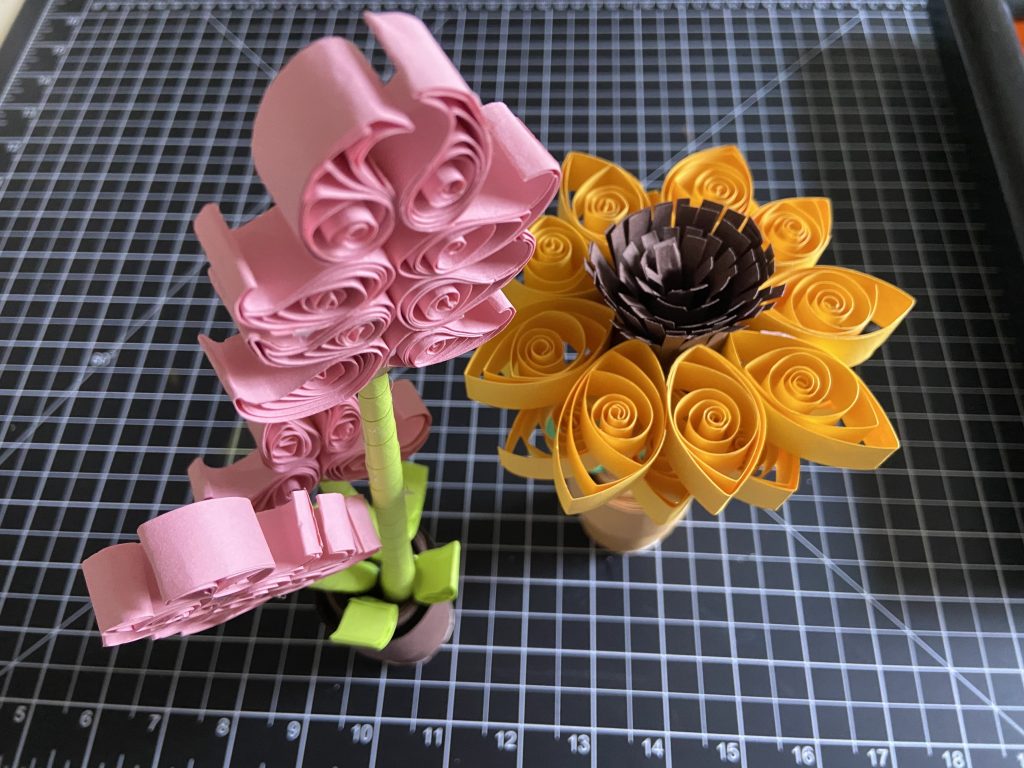
The pots and stems were created in the same manner, but the pot paper strip is 2 ½ inches in the center and 1 inch on the outer rim. The stems are also created from quilled paper strips of ½ inch, but I used hot glue and a thin strip of the gift box inside. (Review the 2nd image in Step 4 to see a detail of how to create a quilled stem reinforced with thin strip and hot glue).
Share your quilling creations with the hashtag #QuarantinedQuiller!
Be brave. Be bold. Be amazing!
The Quarantined Quiller aka The Partitioned Puppeteer aka The Isolated Artist aka The Quarantine Crafter, Studio Programs Coordinator Michael Carsone
Discover more activities from the Museum!
Credit Line: “Chest Over Drawers,” c. 1790, Tulip poplar with pine, 28 3/4 in. x 23 in. x 50 in., Gift of the Estate of Carolyn Lynch, 1977.23.