Art Making Activity: Animal Interpretation!
Challenge: Animal Interpretation!
Using one of the following suggestions (or pick your own!) from the collection, create a new interpretation of the work using animals to replace the characters depicted.
Basic Supplies: Pencil and Paper!
Additional Supplies: Tracing Paper, Ipad (if you have one!), Markers, Crayons, Acrylic Paint.
So where to begin?
Step 1
Select one of the following: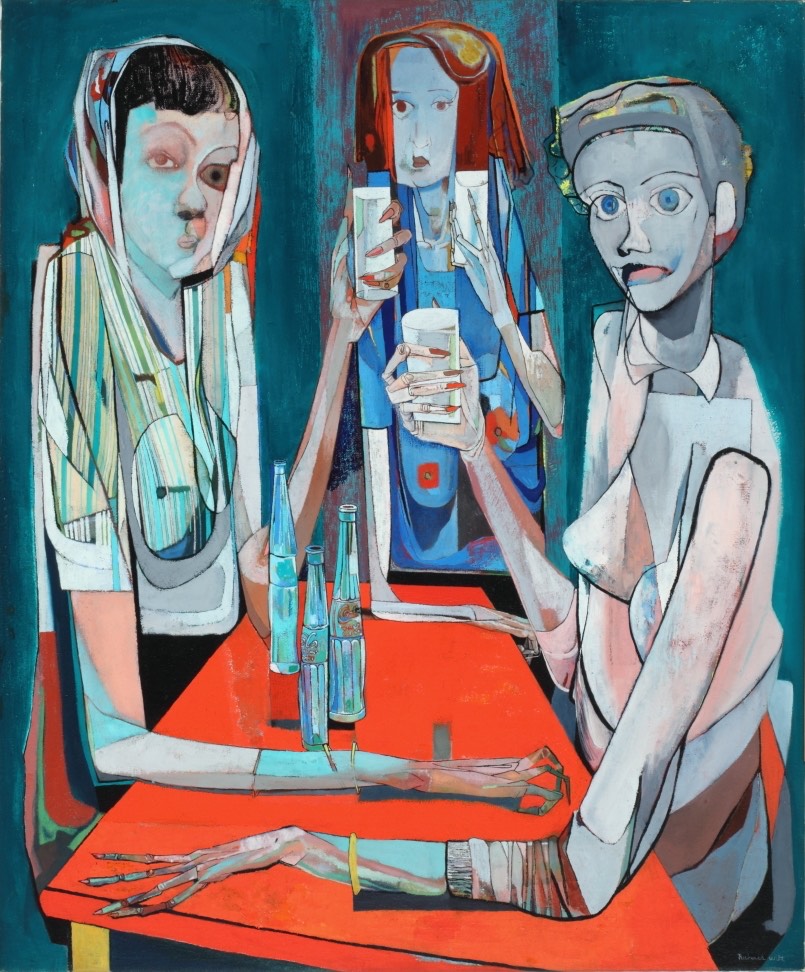
- Mother and Two Children by Mary Cassatt
- Imbibers (The Coke Drinkers) by Richard Wilt
- Portrait of John Gardiner by John Singleton Copley
- Harriet Kelly by Unknown
.JPG)
.JPG)
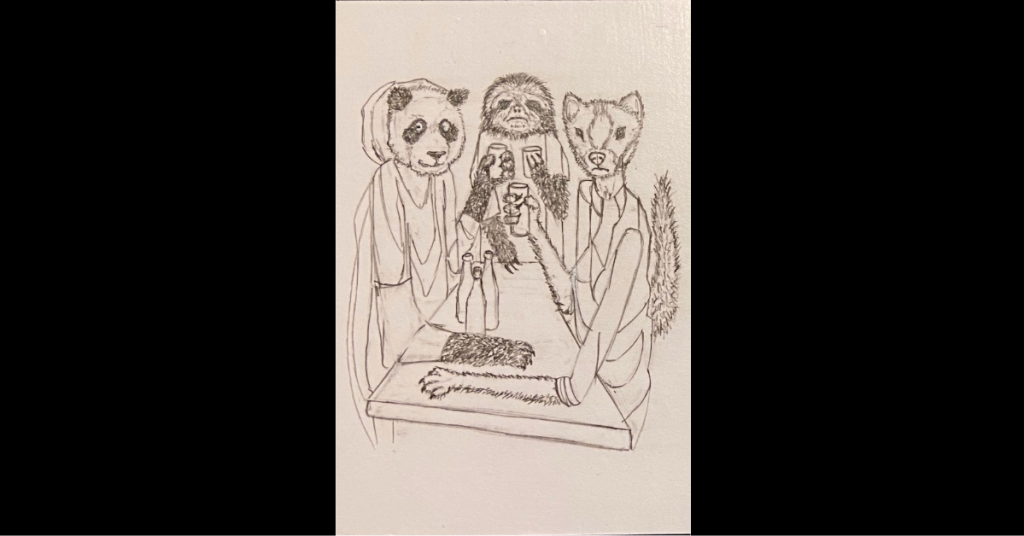
I picked Wilt’s Imbibers to use for my animal interpretation.
Step 2
In drawing any subject, proportion is always the first challenge. An easy way to create better proportions is by using a grid. Sometimes you may need a more sophisticated grid, but for this project a simple 4-quadrant grid should suffice.
Create the 4-quadrant grid by imagining a line down the center and across the middle of the artwork. On your drawing paper, you can draw light lines in pencil that can be erased later. (See my 4-quadrant grid example below – the one on the left with the pink lines.) This grid is how to break down the composition into smaller parts to make your proportions fit the page more correctly. If you have access to a printer, you can draw on the paper copy. If not, I have used an Ipad and used paper to block out 3 of 4 quadrants. (Fold the piece of paper in 4, cut out one section and turn paper as needed to block each area.)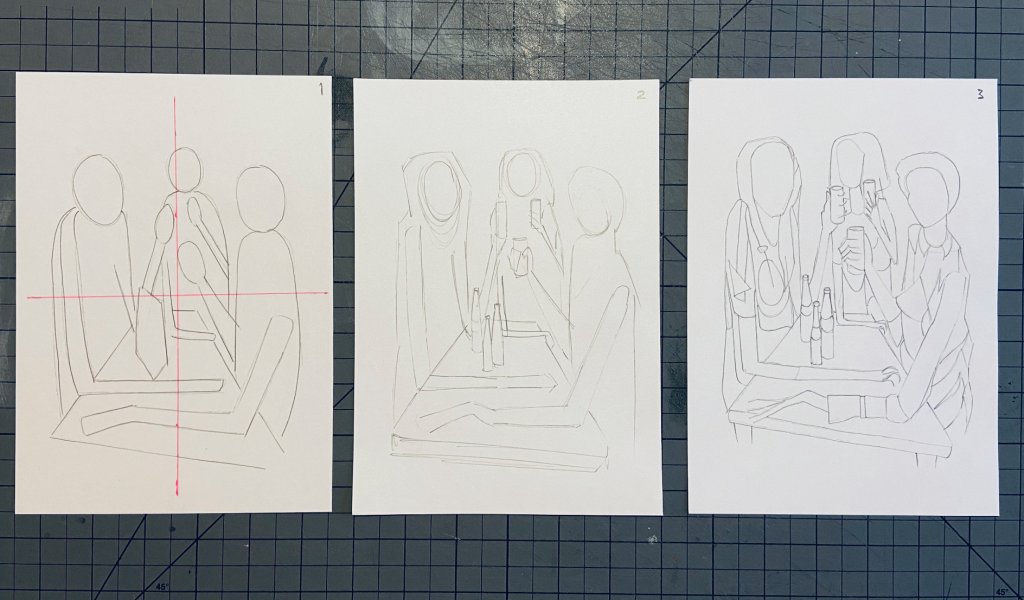
Step 3
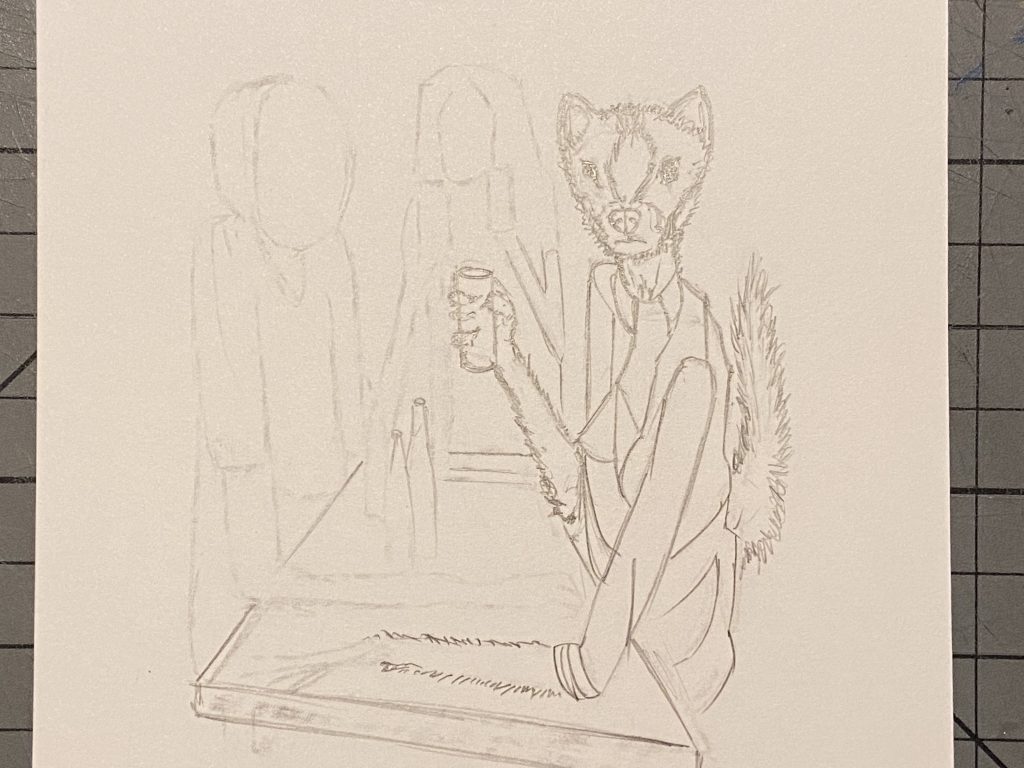
Next, sketch in lightly the major shapes you see. Break down the pieces into basic geometric shapes – real simple stuff. Remember light lines! Continue to add more and more detail as you go, and you can erase unwanted pencil as you go. View the middle sketch (above) and the last sketch on the right (above) to see my progression from basic shapes to a more fleshed out drawing.
Step 4
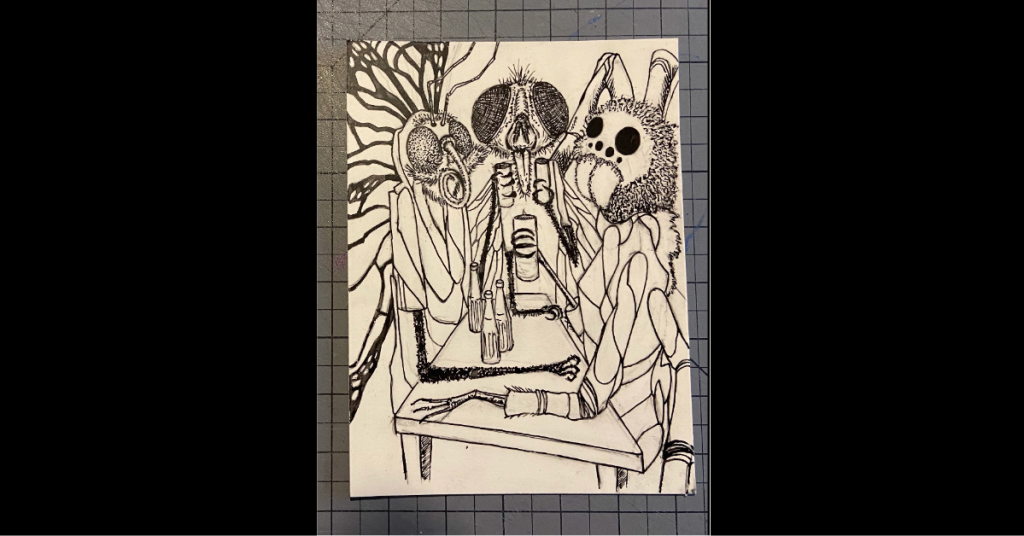
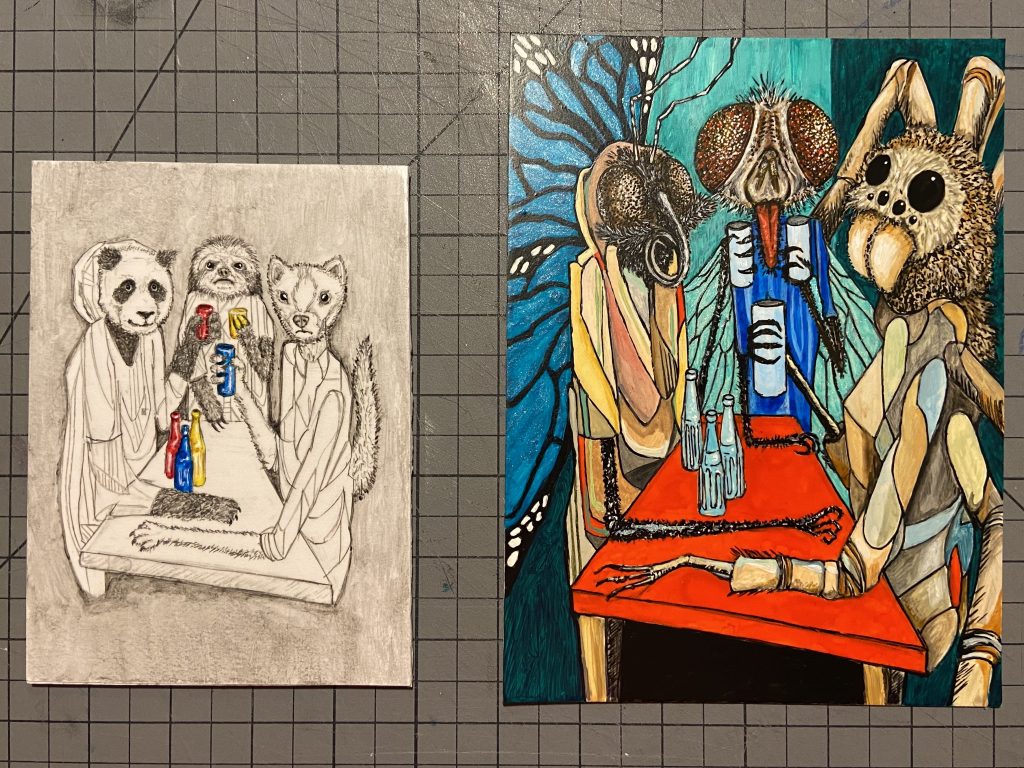
Now for the fun part! Change the head and arms/legs to depict an animal of your choice! You can create a pencil drawing, or you can add color using a medium of your choice. In the below image, I made bugs and used a fine sharpie to crisp up my lines.
_____________________________________________________________________________
You can also use this Ipad hack that may help you “cheat” the drawing process!
1. Snapshot the artwork.
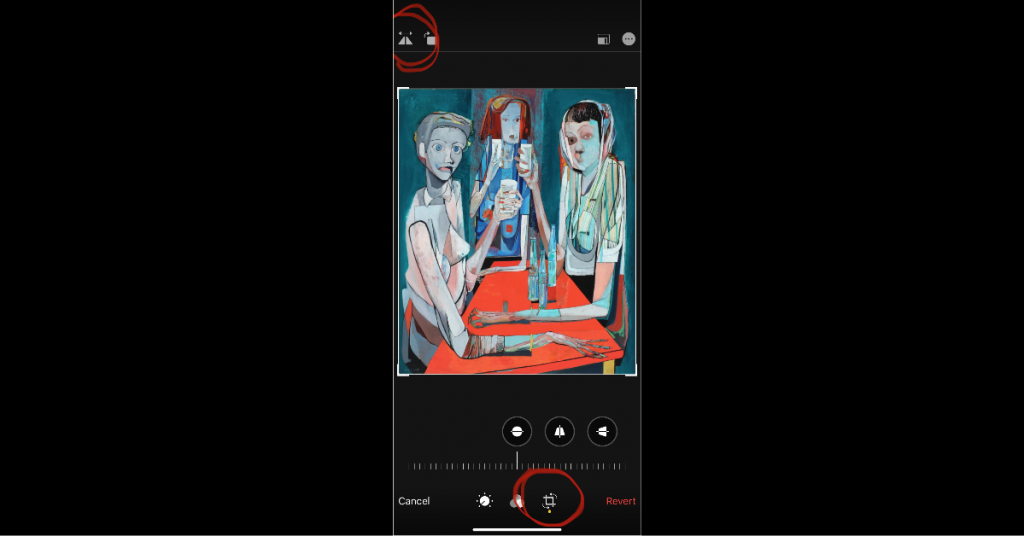
2. Edit the photo by clicking the crop tool on the bottom right, and then click the horizontal flip in the upper left corner (see screenshot below).
3. Save the image.
4. Use a piece of tracing paper and tape it down so the image won’t move. It also helps to set your screen so it won’t go dark, but that is optional (see my example image below).
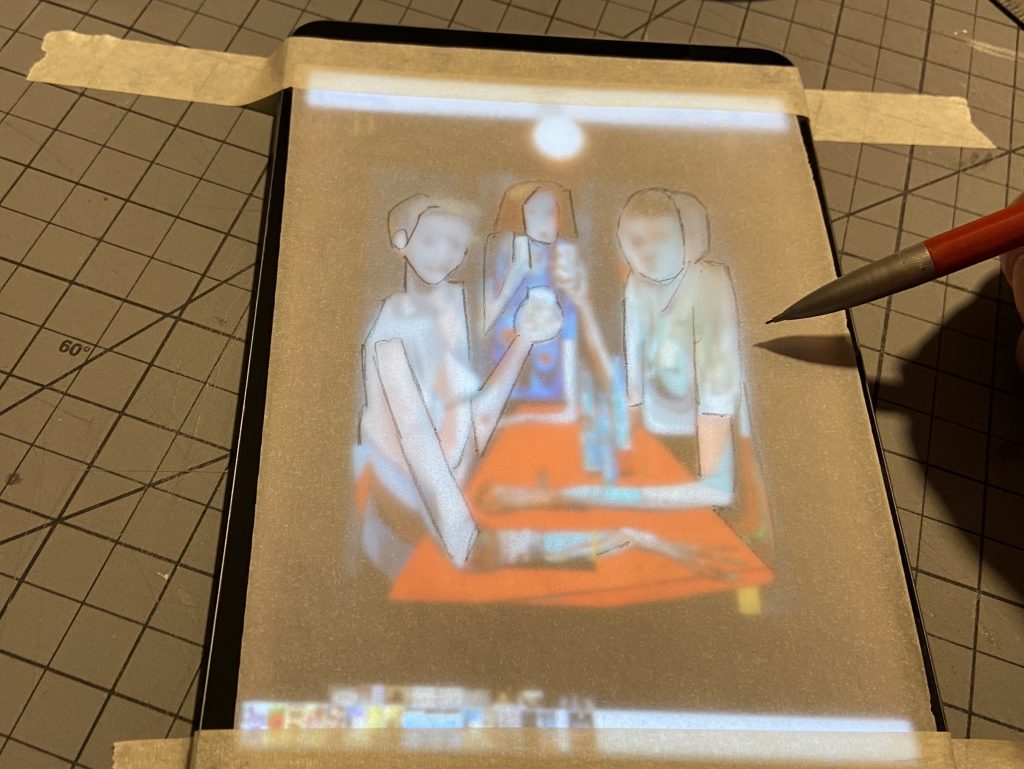
5. Trace the basics of the image.
6. Clean up your lines and fix the drawing on the tracing paper.
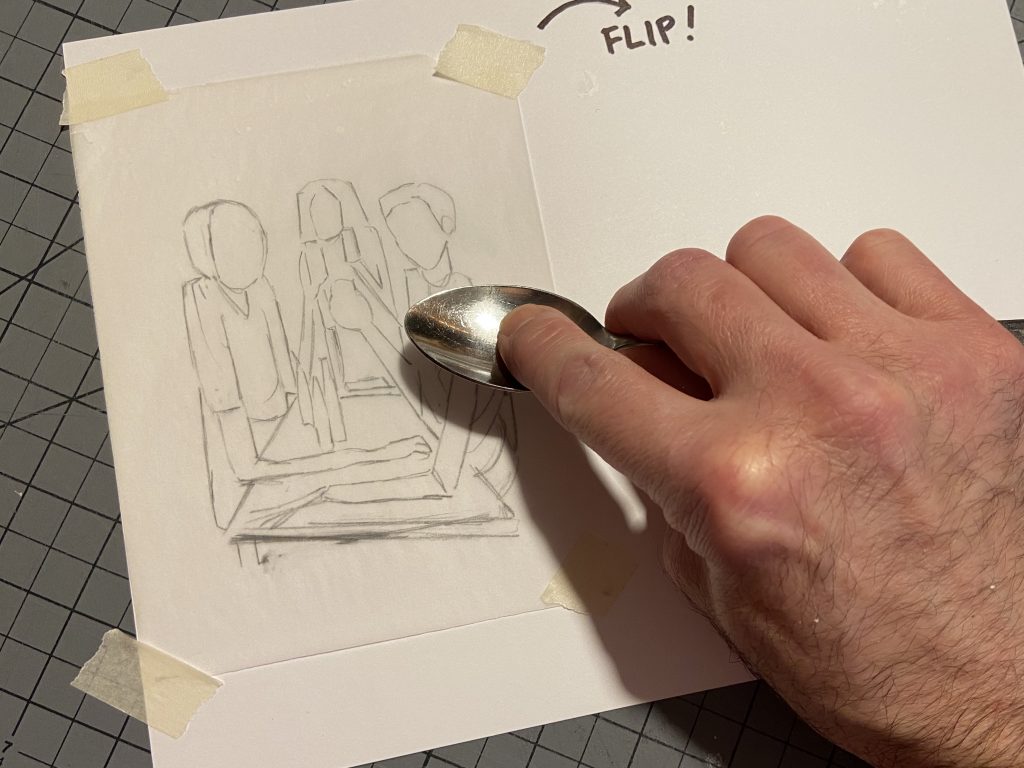
7. Flip that image over onto your good drawing paper.
8. Use small bits of tape to affix all four corners, and using the bowl of spoon and nice pressure, transfer the drawing onto the good paper by rubbing (see below image).
9. Check the image by removing only the bottom tape corners and lifting tracing paper (see below image).
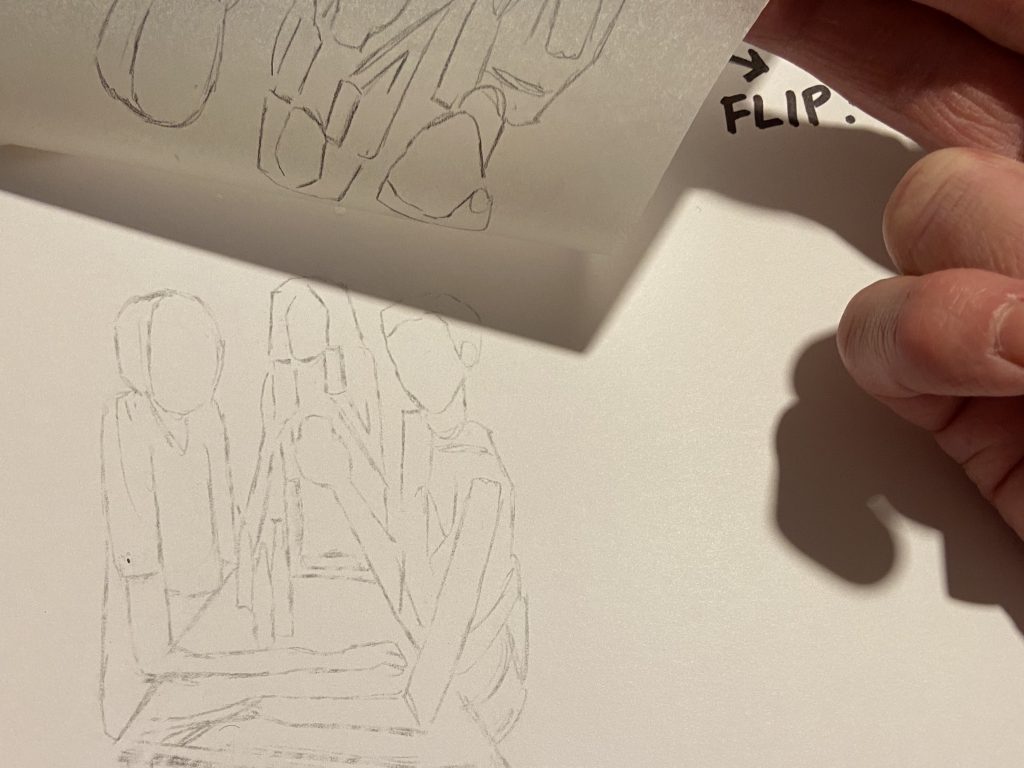
10. If not quite right, replace paper and apply more pressure.
11. Once the drawing is transferred, remove the tracing paper and create your animals! (See my example below!)
 Again, you can create a simple pencil drawing or enhance as you wish with whatever materials you have available to you – colored pencils, crayons, paint, etc.
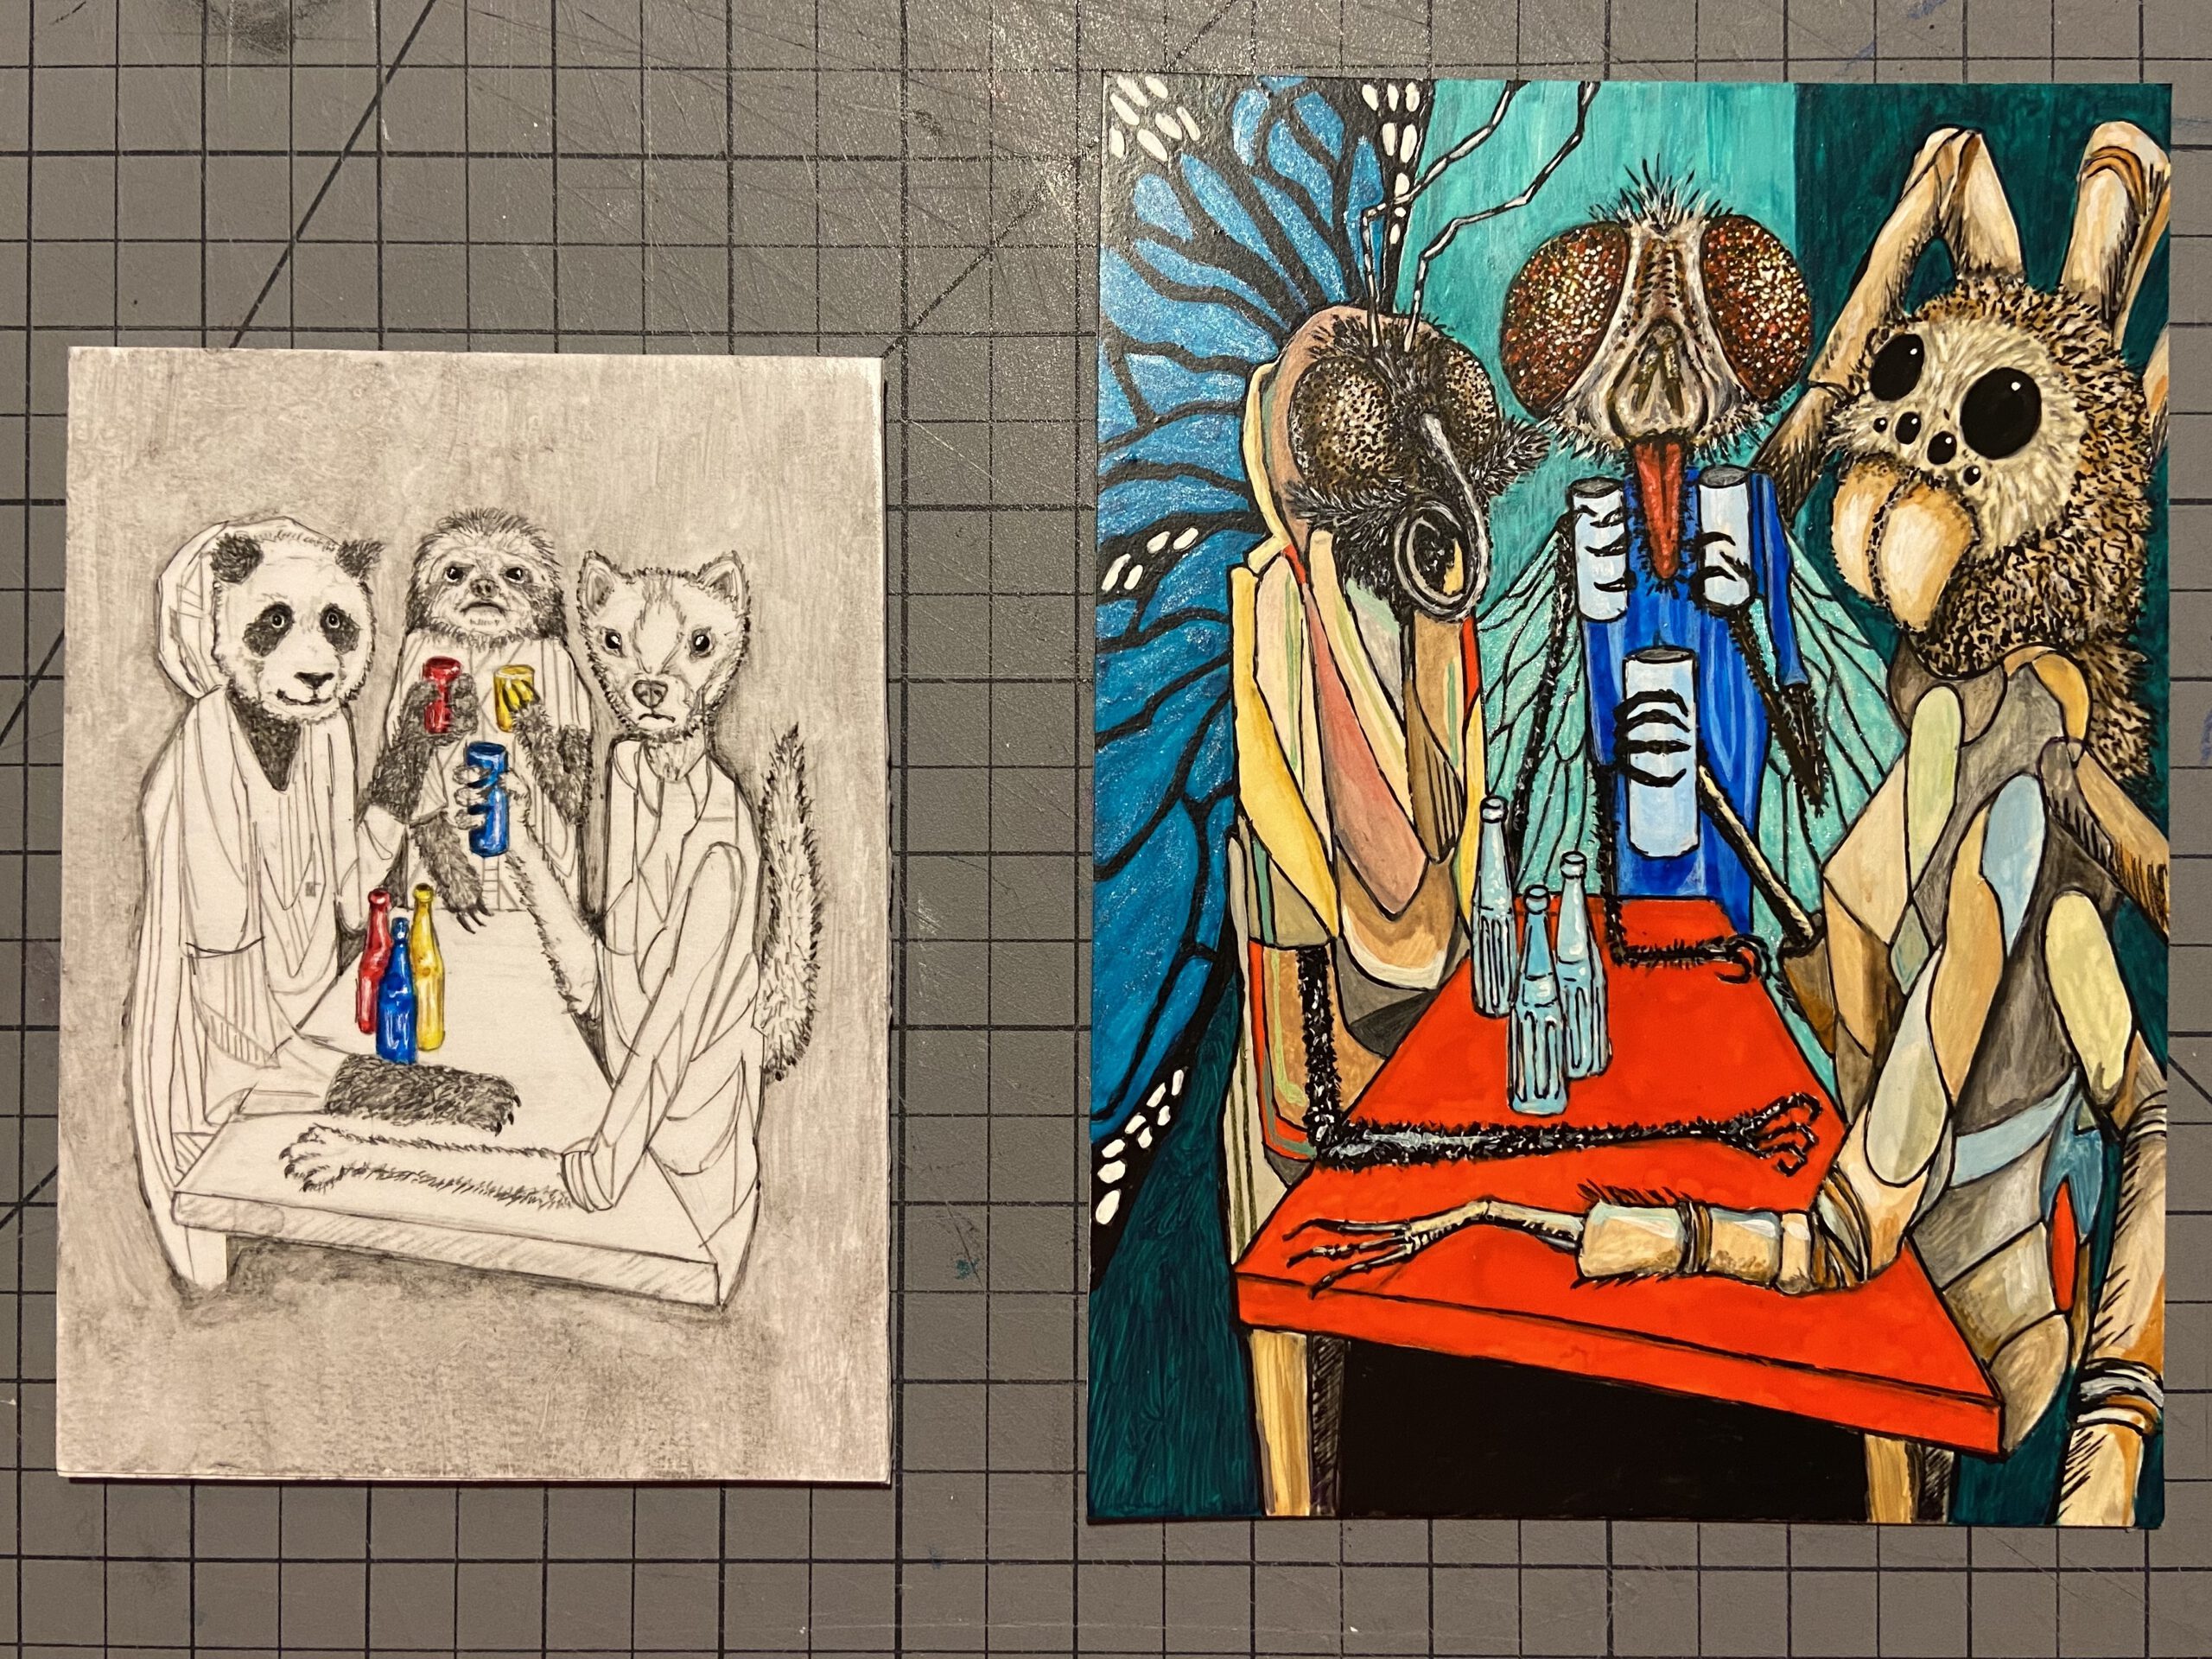
This is my completed pencil drawing.
In the end, I did add a bit of color to the completed work using red, yellow and blue paint on the bottles and the glasses (left image). I also decided to add color to the bug drinkers that I drew during the first sequence using acrylic paint and sharpie markers (right image).
Remember, these things take time, and creating art is an investment.
Right now, many of us have been given some extra time.
So, I hope you will make the investment.
Be brave. Be bold. Be amazing!
The Isolated Artist aka The Quarantine Crafter